This workshop looks at how to draw hearts using various mathematical skills of increasing difficulty.
Click on the title for your chosen level to reveal the challenges, then see how far you can push yourself.
Each of the below challenges require the use of different shapes. We provide the templates for all of these in our Primary Templates pdf
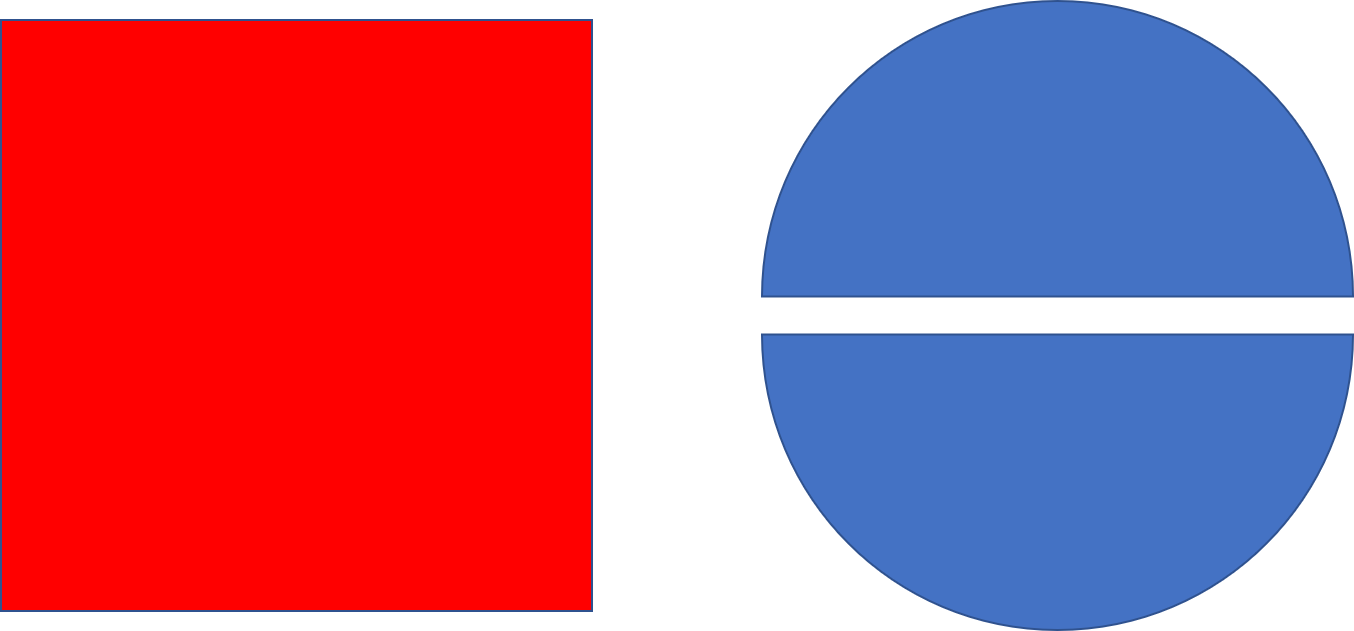
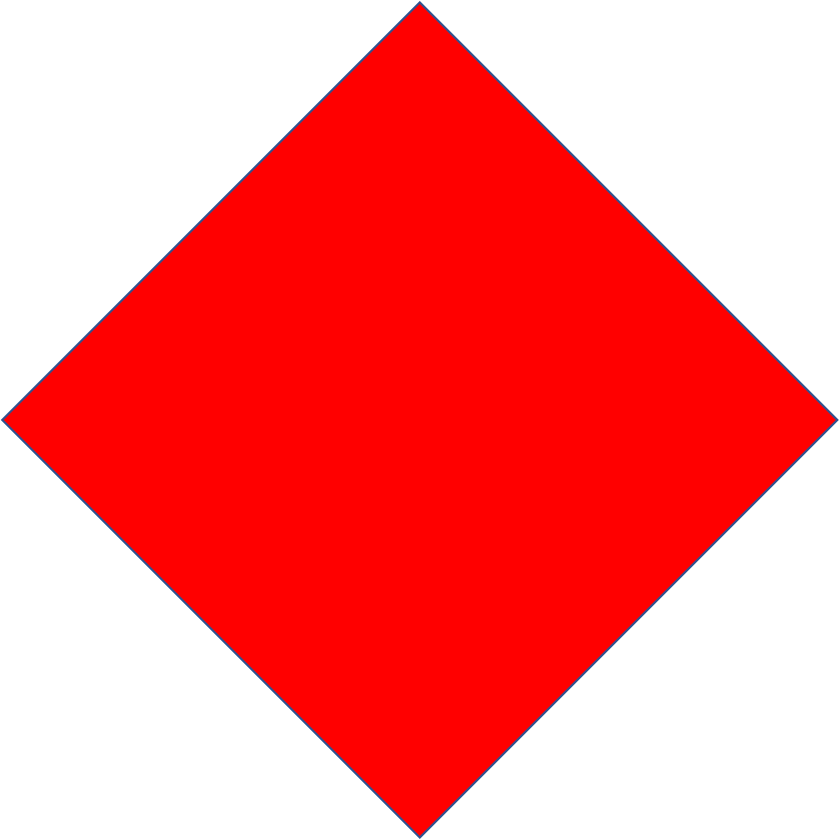
Can you produce a heart using these shapes?
Rotate the square to rest on one point like this:
Can you produce a heart using these shapes?

Start by matching up the straight side of a semi-circle with a side of the same length on a triangle
Can you produce a heart-like design using these shapes?

Each shape in this challenge only has one straight edge. The straight edges need to rest against each other.
As a fun additional to this exercise we have included these instructions for how to create your own woven heart designs.
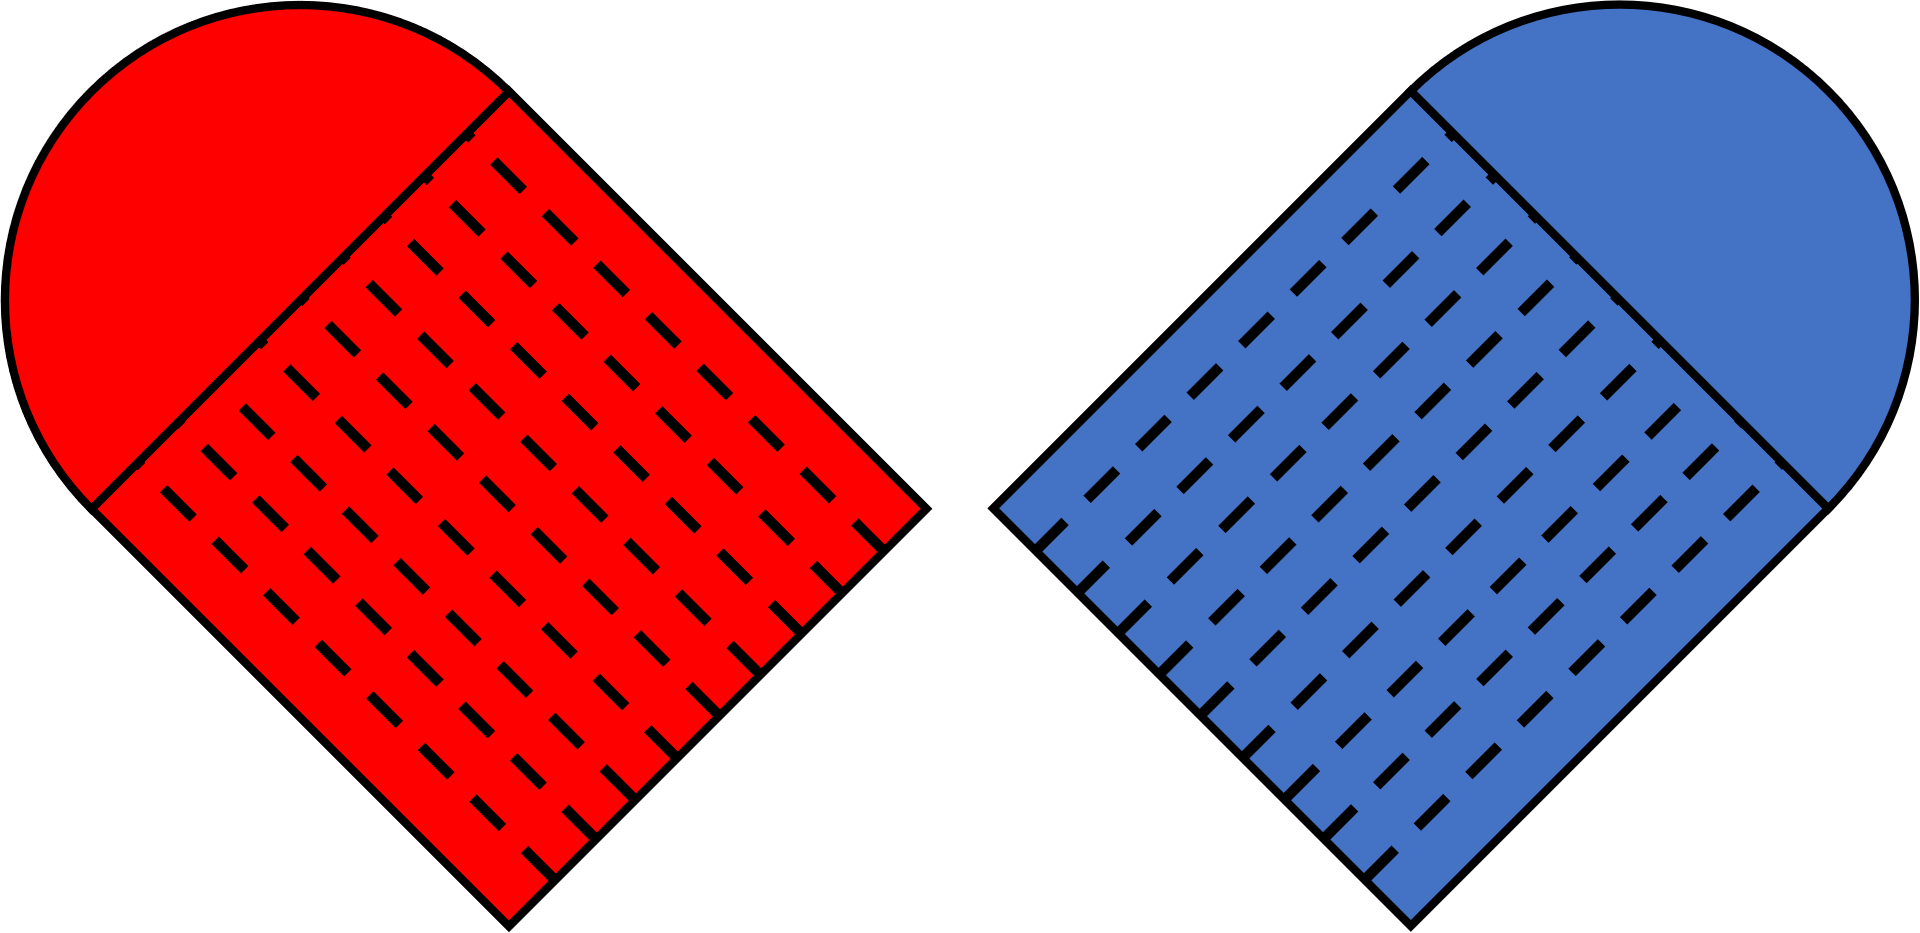
You can either draw your own version of these shapes or use our printable woven heart templates.
We recommend you use card instead of paper to prevent accidental tearing.
As this activity involves the use of scissors, please make sure there is a responsible adult supervising.
You need to cut the two shapes around the full outline - Do not cut the solid line that goes through the shapes.
Now cut along each of the dashed lines up to the solid line
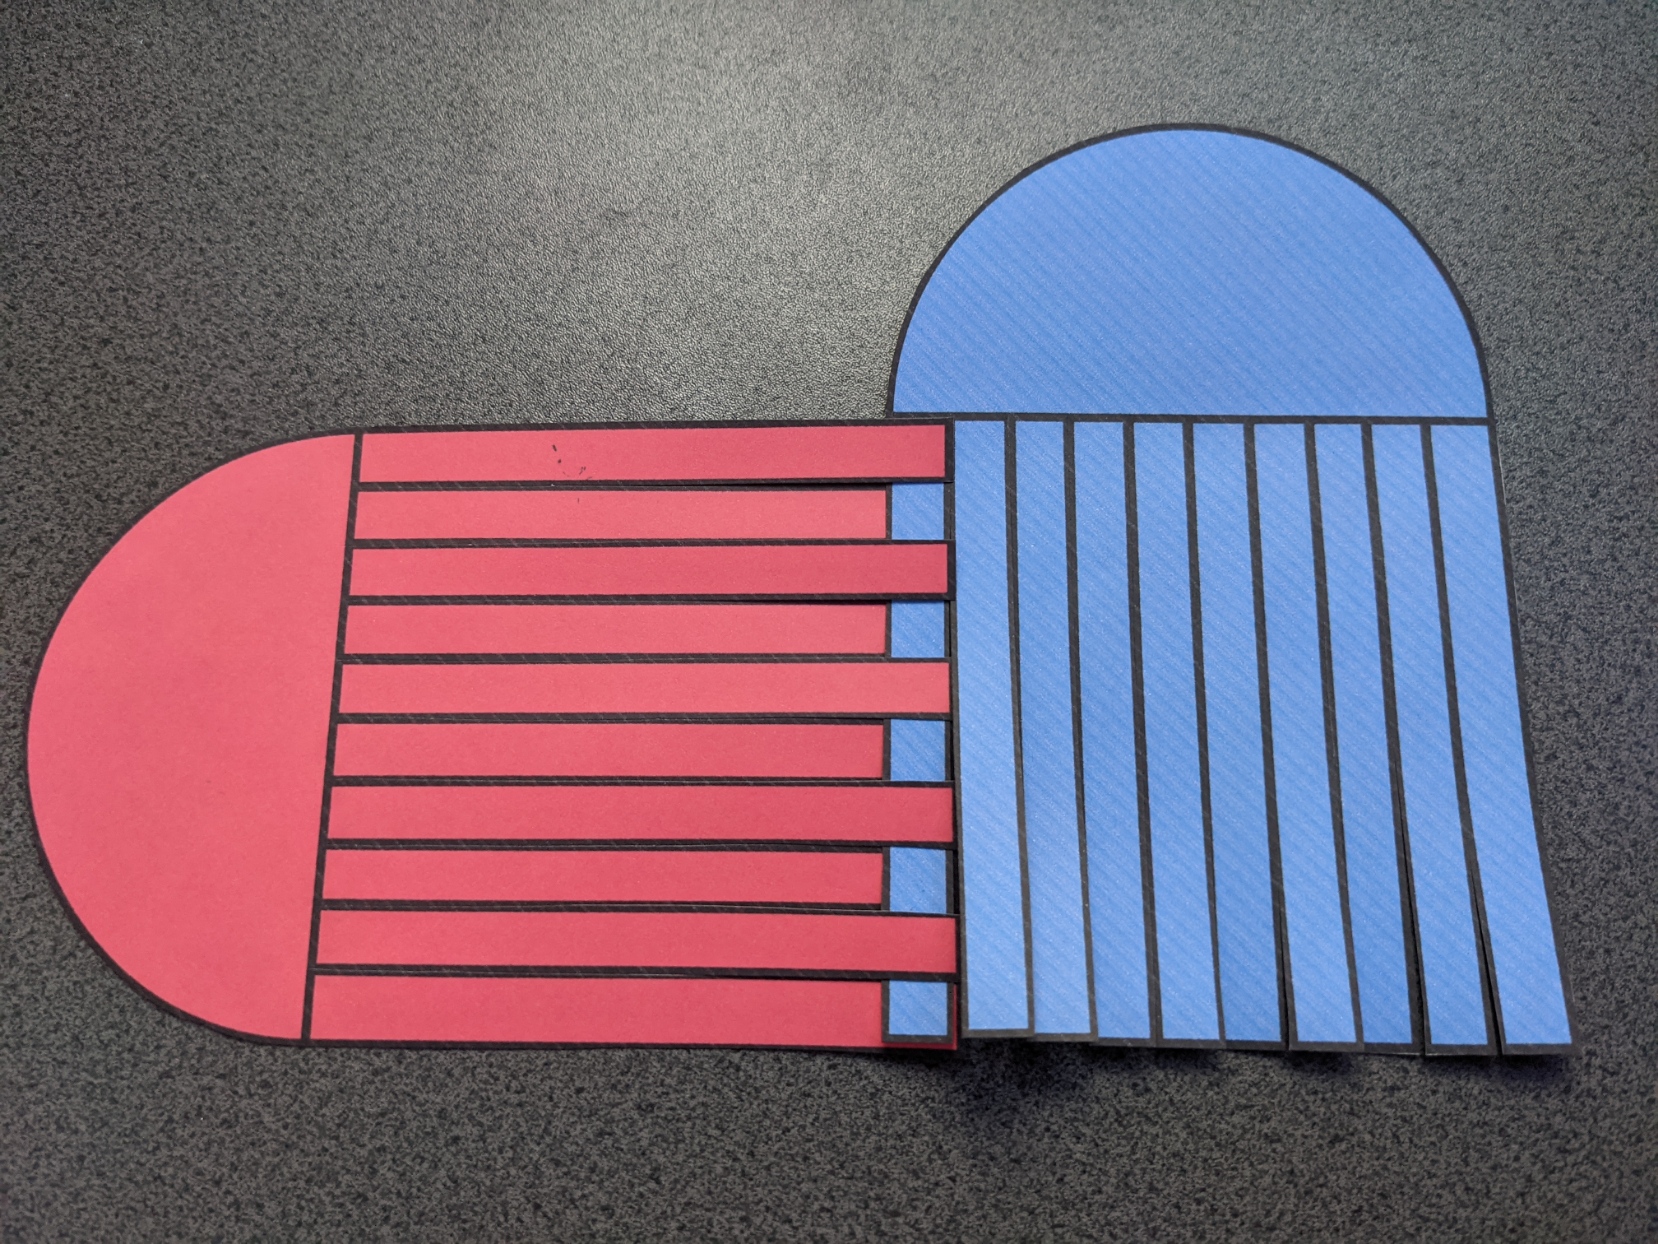
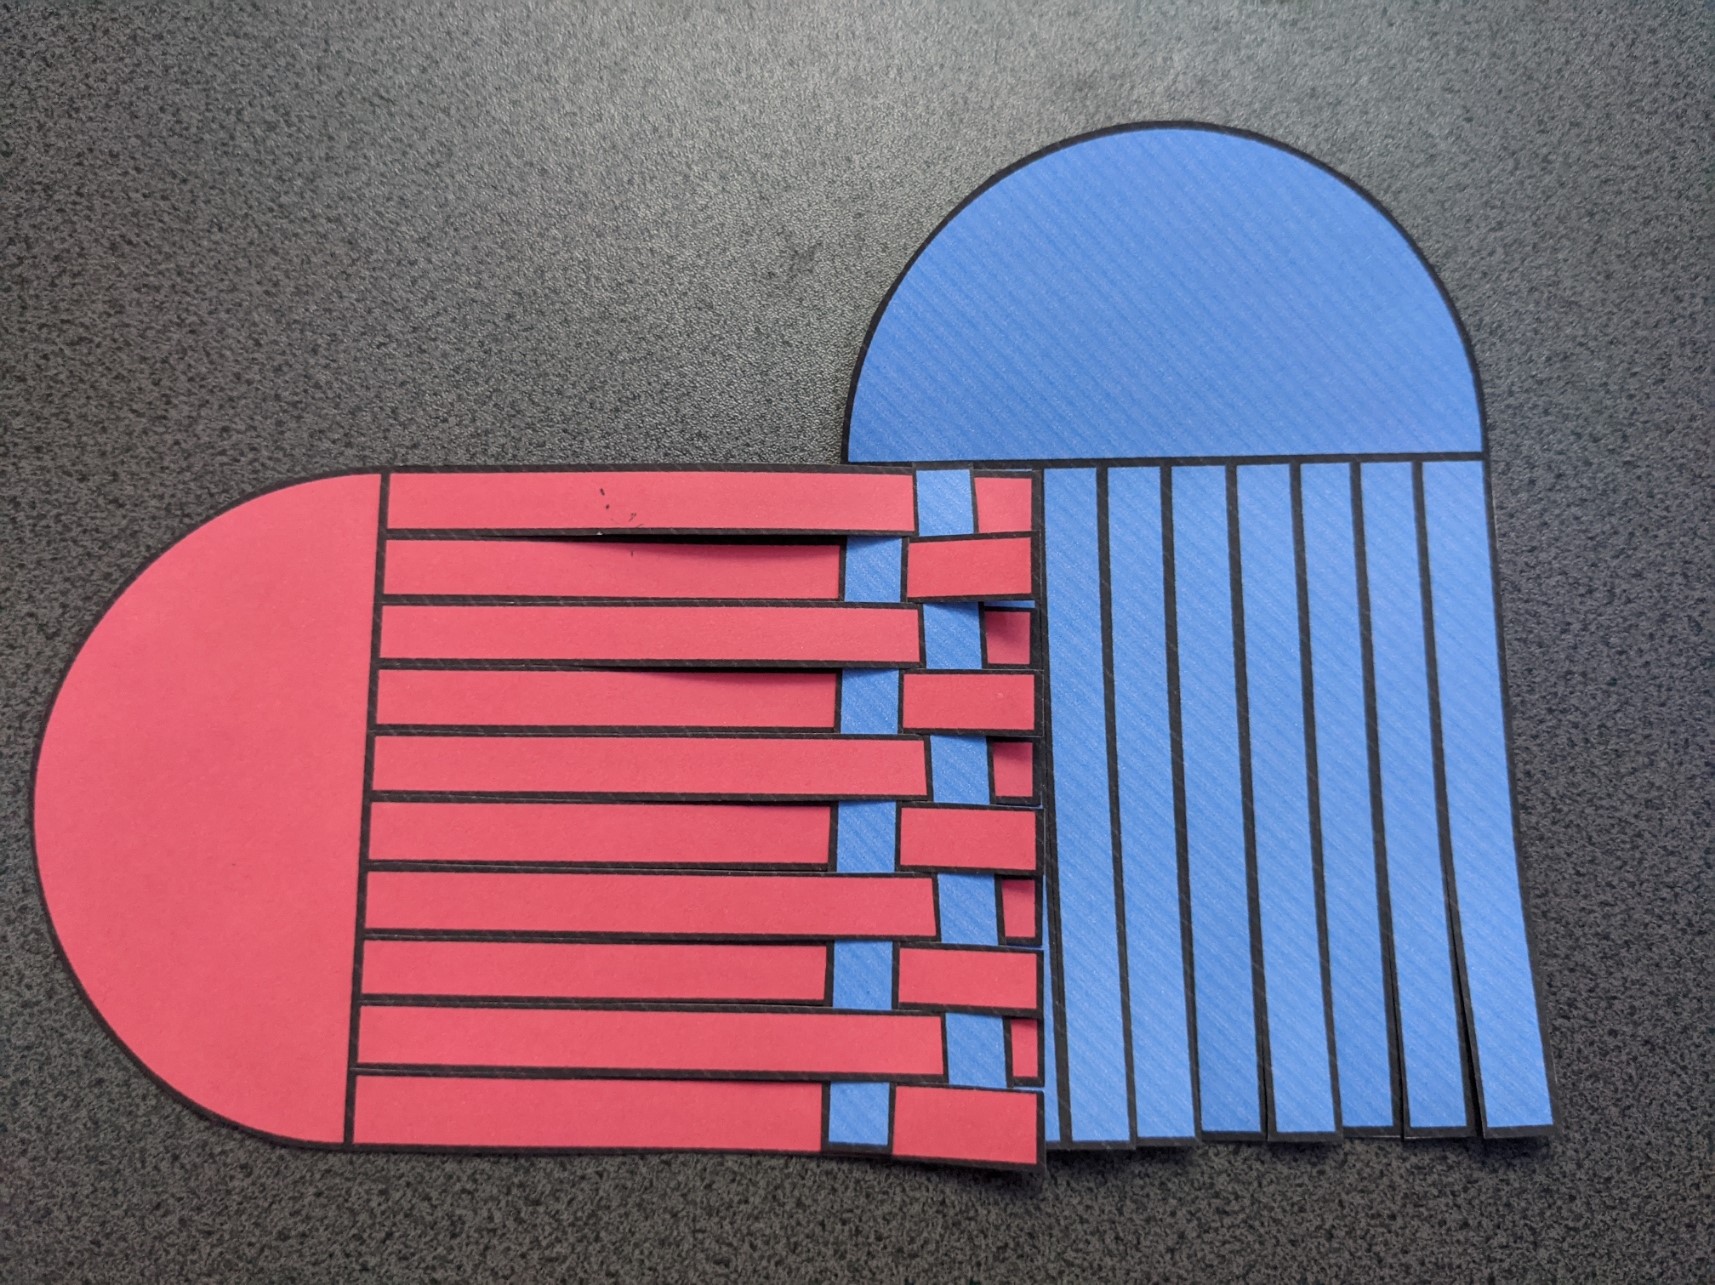
Carefully weave the strands together, as shown in the below images:
Once completed it should look something like this:
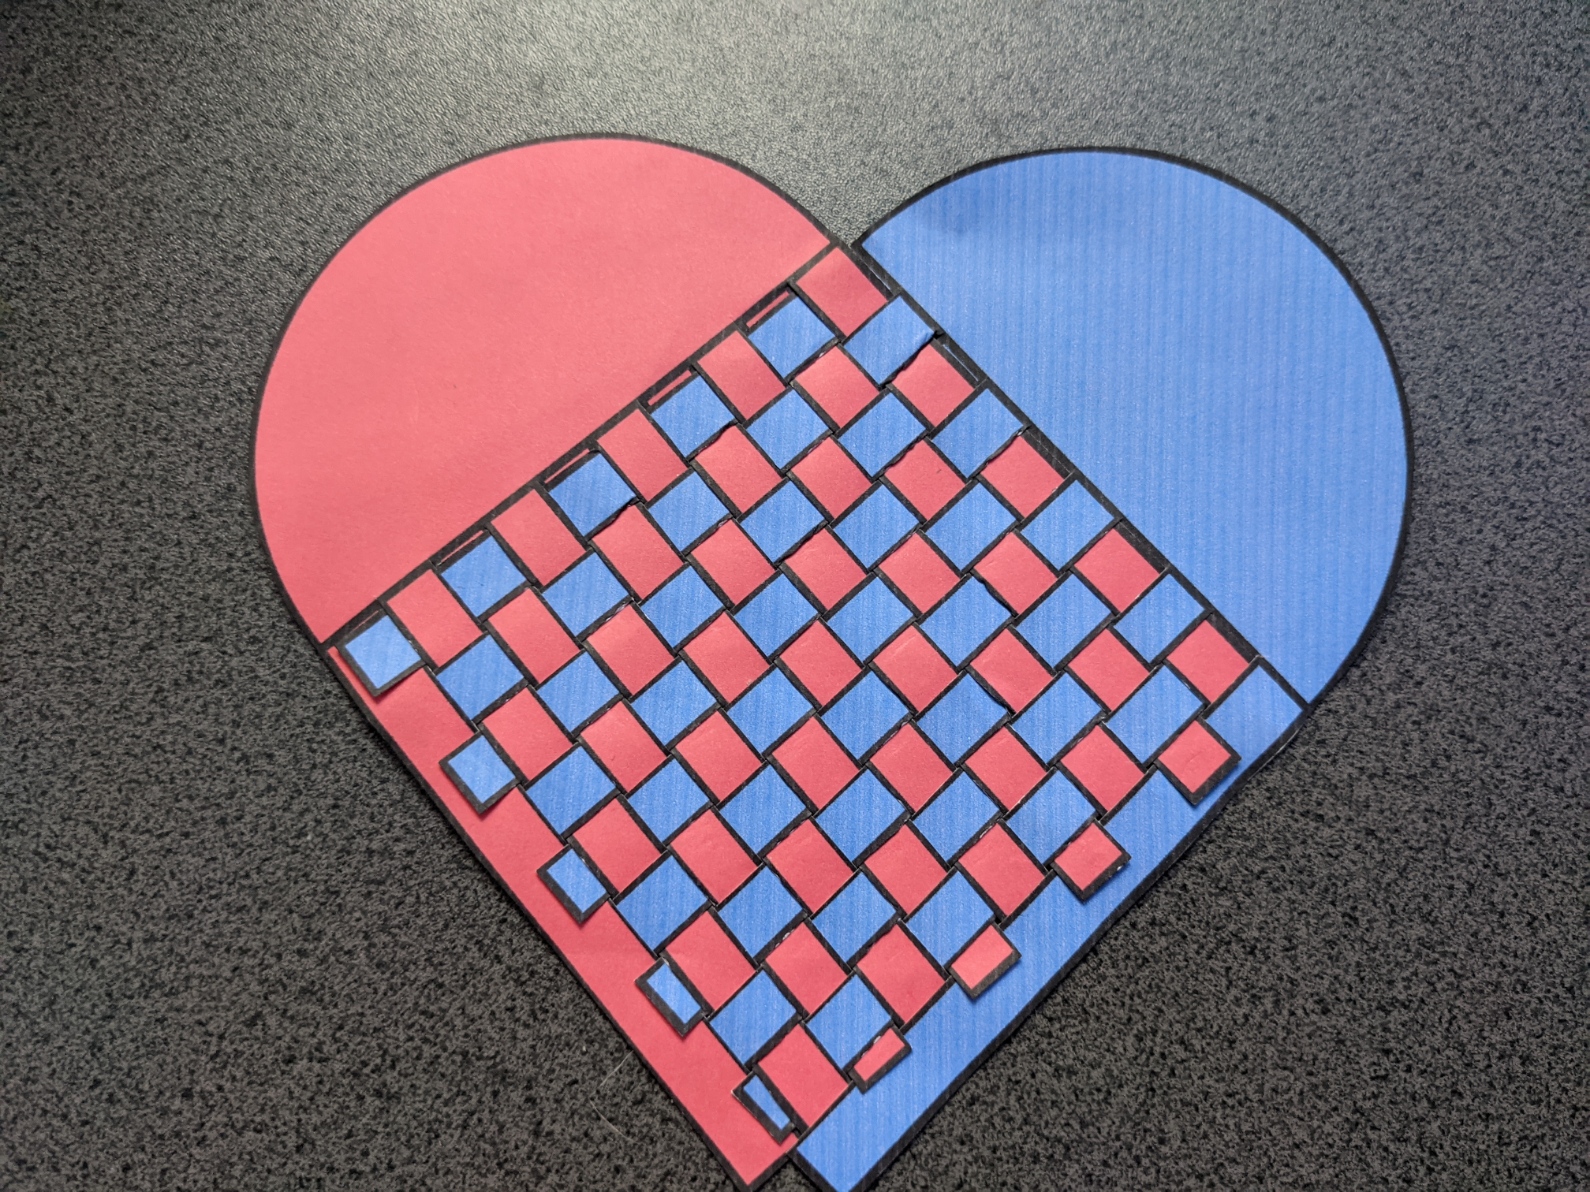
Tips: You could use paperclips to hold strands in place until completed. You can also use clear tape on the back to hold it all in place
Want to do more? Try out different colours, sizes and numbers of strands.
These challenges are designed to test your knowledge of shape and line descriptions.
You will need a pencil, ruler, protractor and drawing compass.
Follow these instructions:
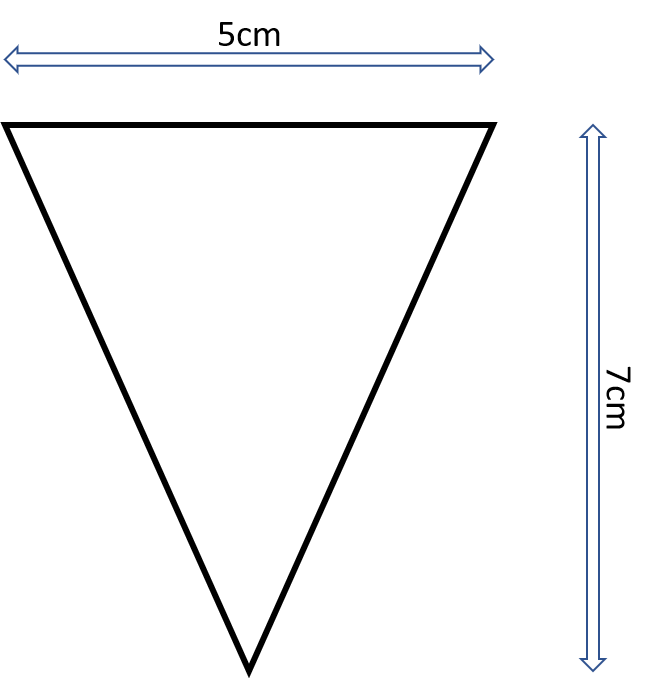
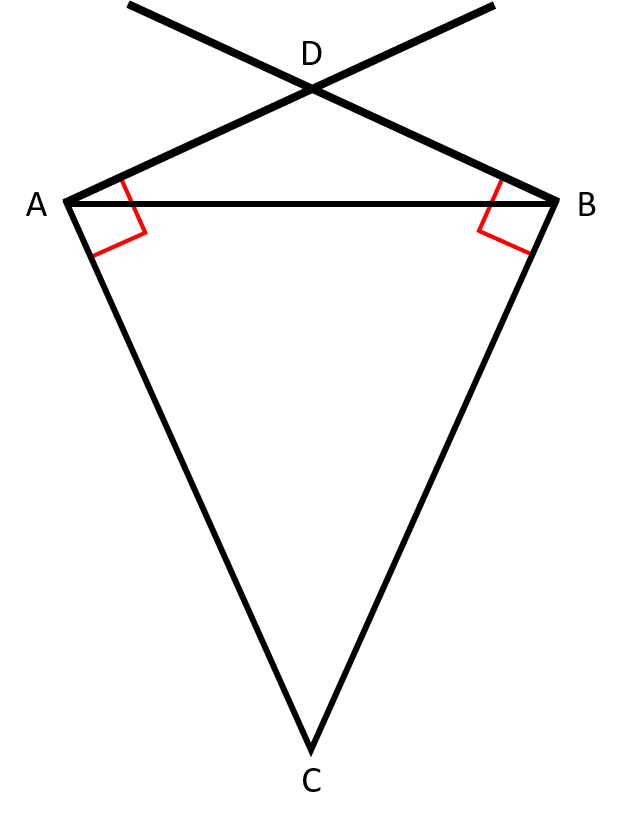
Draw an isosceles triangle standing on its point. It should be 5cm wide and 7cm tall
Call the points on the horizontal line A (on the left) and B (on the right), whilst the point at its base is C
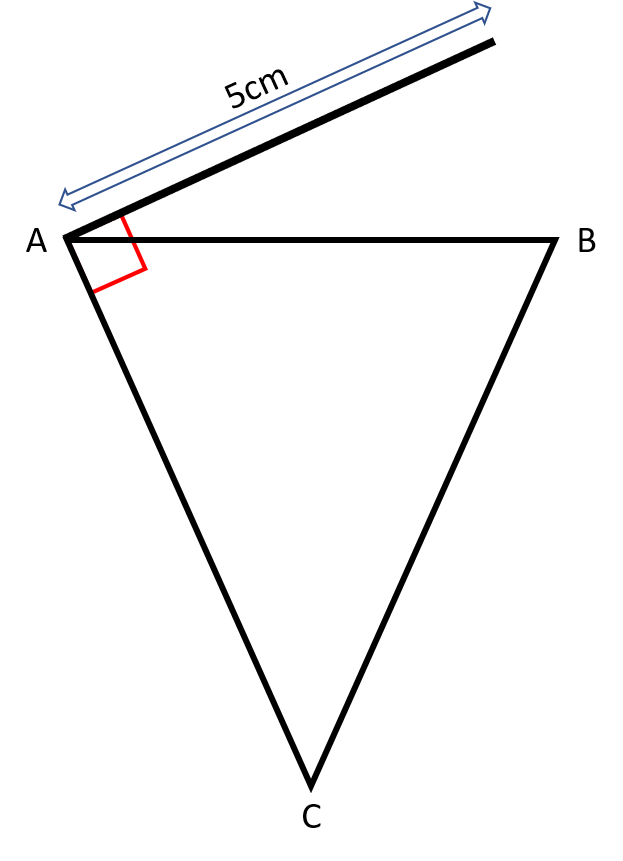
At point A, draw a 5cm line perpendicular to line AC in the upwards direction.
What does perpendicular mean?
To be perpendicular to a line it needs to be at right angles (90°) to it
At point B, draw a line perpendicular to line BC, it crosses the line drawn in the previous step at point D
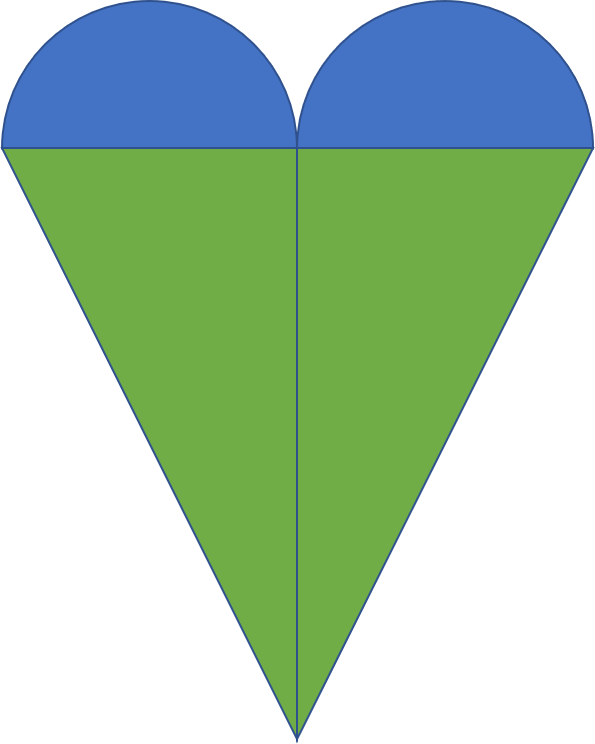
Using a compass, draw an arc clockwise from point A to D
What is an arc?
An arc is a section of a circle's circumference (edge).
How do I set up the compass for this arc?
The compass spike should be in the centre of the circle, which will be on the mid-point of line AD.
The compass should be opened up so as the pencil starts on point A.
Using a compass, draw an arc anti-clockwise from point B to D
Follow these instructions:
Draw a 5cm horizontal line
Mark one end point A and the other point B
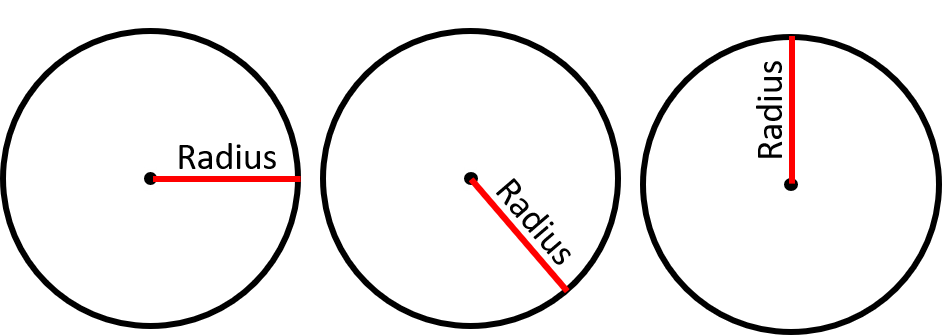
Using point A as the centre, draw a circle with a radius of 2.5cm
What is the radius of a circle?
The radius is the distance between the centre of the circle to any point on the arc/circumference.
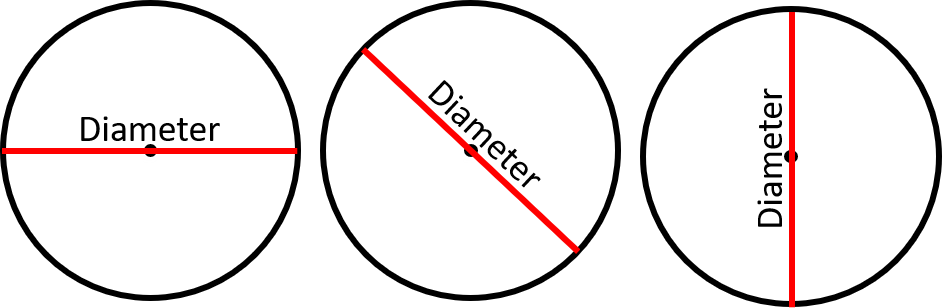
Using point B as the centre, draw a circle with a diameter of 5cm
What is the diameter of a circle?
The diameter is the distance between opposite points on the arc/circumference of a circle.
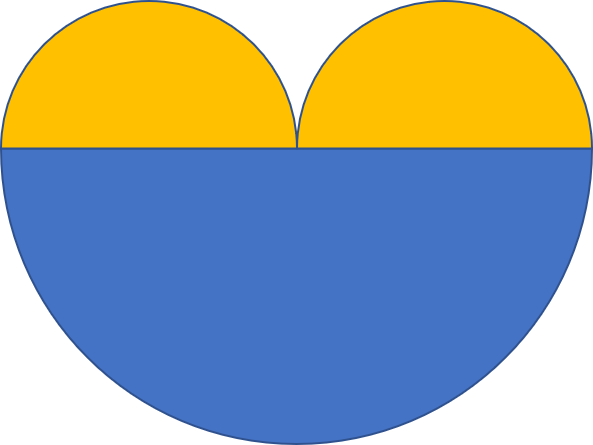
Where the two circles meet, draw a straight line downwards 7 cm. The line end is point C
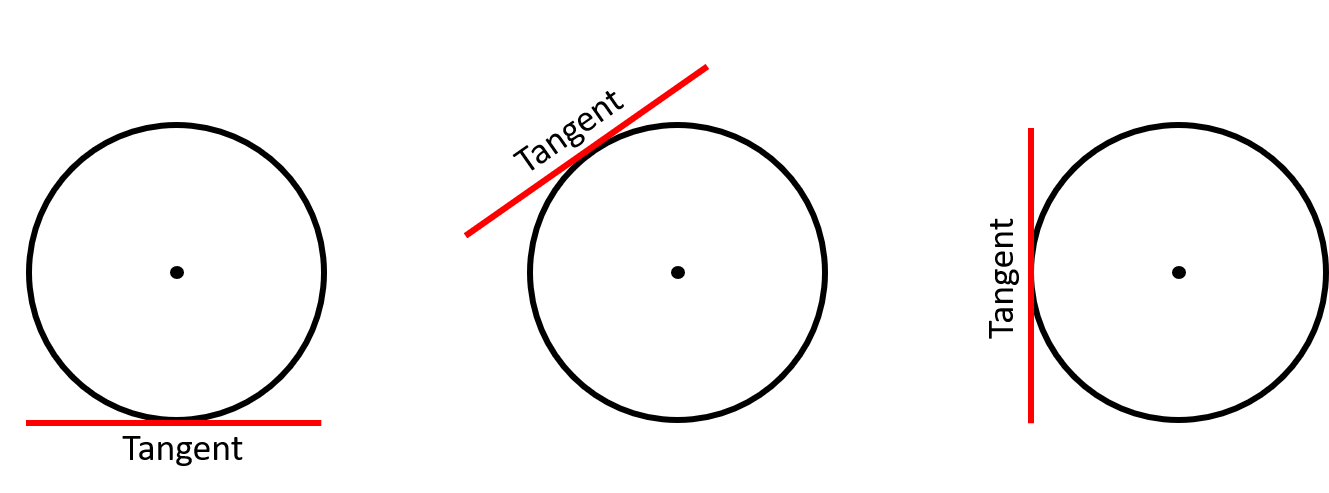
Draw the tangent line for each circle that will connect to point C
What is a tangent line?
A tangent to a circle is any straight line that touches on the edge of a circle without passing through the circle's arc.
Follow these instructions:
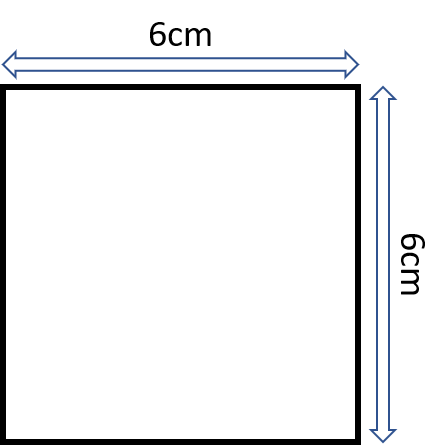
Draw a square with an area of 36cm2
How do I work out the length of the sides?
The area of any square or rectangle = width x height.
A square has the same width and height.

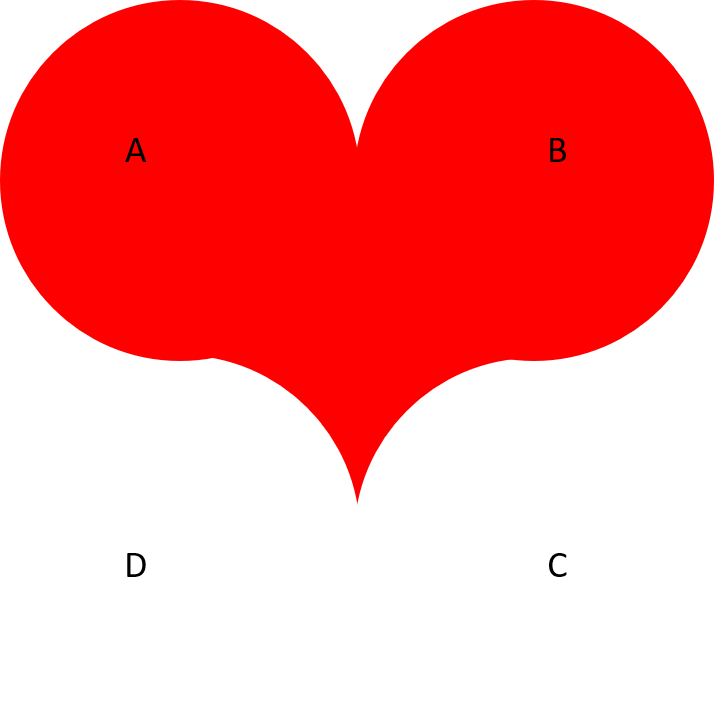
Label the corners A, B, C and D, in a clockwise direction, with A being the top left.
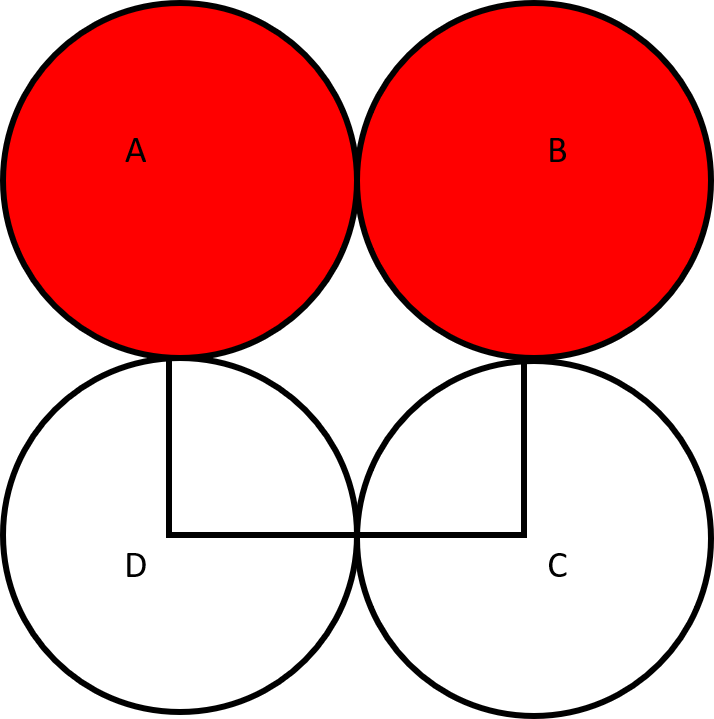
Draw a circle of 6cm diameter with point A as the centre
What is the diameter of a circle?
The diameter is the distance between opposite points on the arc/circumference of a circle.
Repeat the last step using points B, C and D as the centres
Using a red pen/pencil, colour in the circles surrounding points A and B
With the same red pen/pencil colour in the shape formed inside the square by the arcs of all four circles
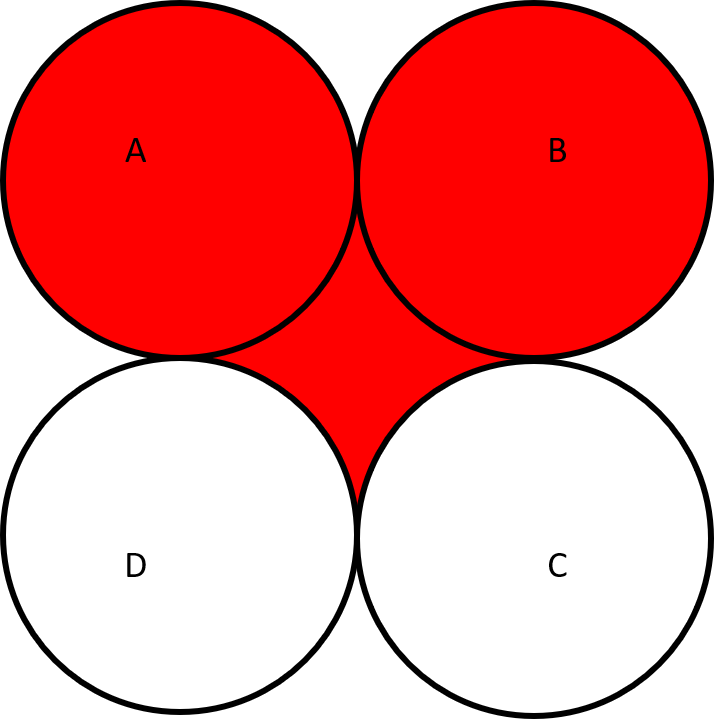
To help show the final heart design, we have deleted the shape outlines in the below version:
This next selection of challenges will require the use of scissors, glue and tape.
Get an A4 piece of paper or card.
Cut off a strip 2cm in width.
Using this single strip of paper (which has two sides), try to create a single-sided shape.
You will not need to use scissors, but you will need some tape.
Surely this is impossible? The paper will always have two sides.
It is possible. There is a 'twist' to this challenge when taping the ends together.
To create a one-sided shape, tape the paper into a loop with a single twist. To test it, take a pen or pencil and draw a line along the centre of the strip - it should join together without being removed from the paper, proving it is one-sided.

This single-sided shape is called a Möbius Strip.
Either create a new Möbius Strip or use the one from challenge 7, draw a line down the centre.
What shape(s) would we get if we cut along this line? Consider this, don't do it yet.
Think about (or even experiment with) what would happen if you cut a simple loop (no twists) of paper along the centre line.
Let us find us out. Cut your Möbius Strip along the centre line.
What shape(s) have you ended up with? How many sides?
We now have a loop with two sides (an inside and an outside edge) which has four twists!
How many twists are there in the shape(s)? You can check by cutting through the strip and counting how many times you need to turn the paper to untwist it.
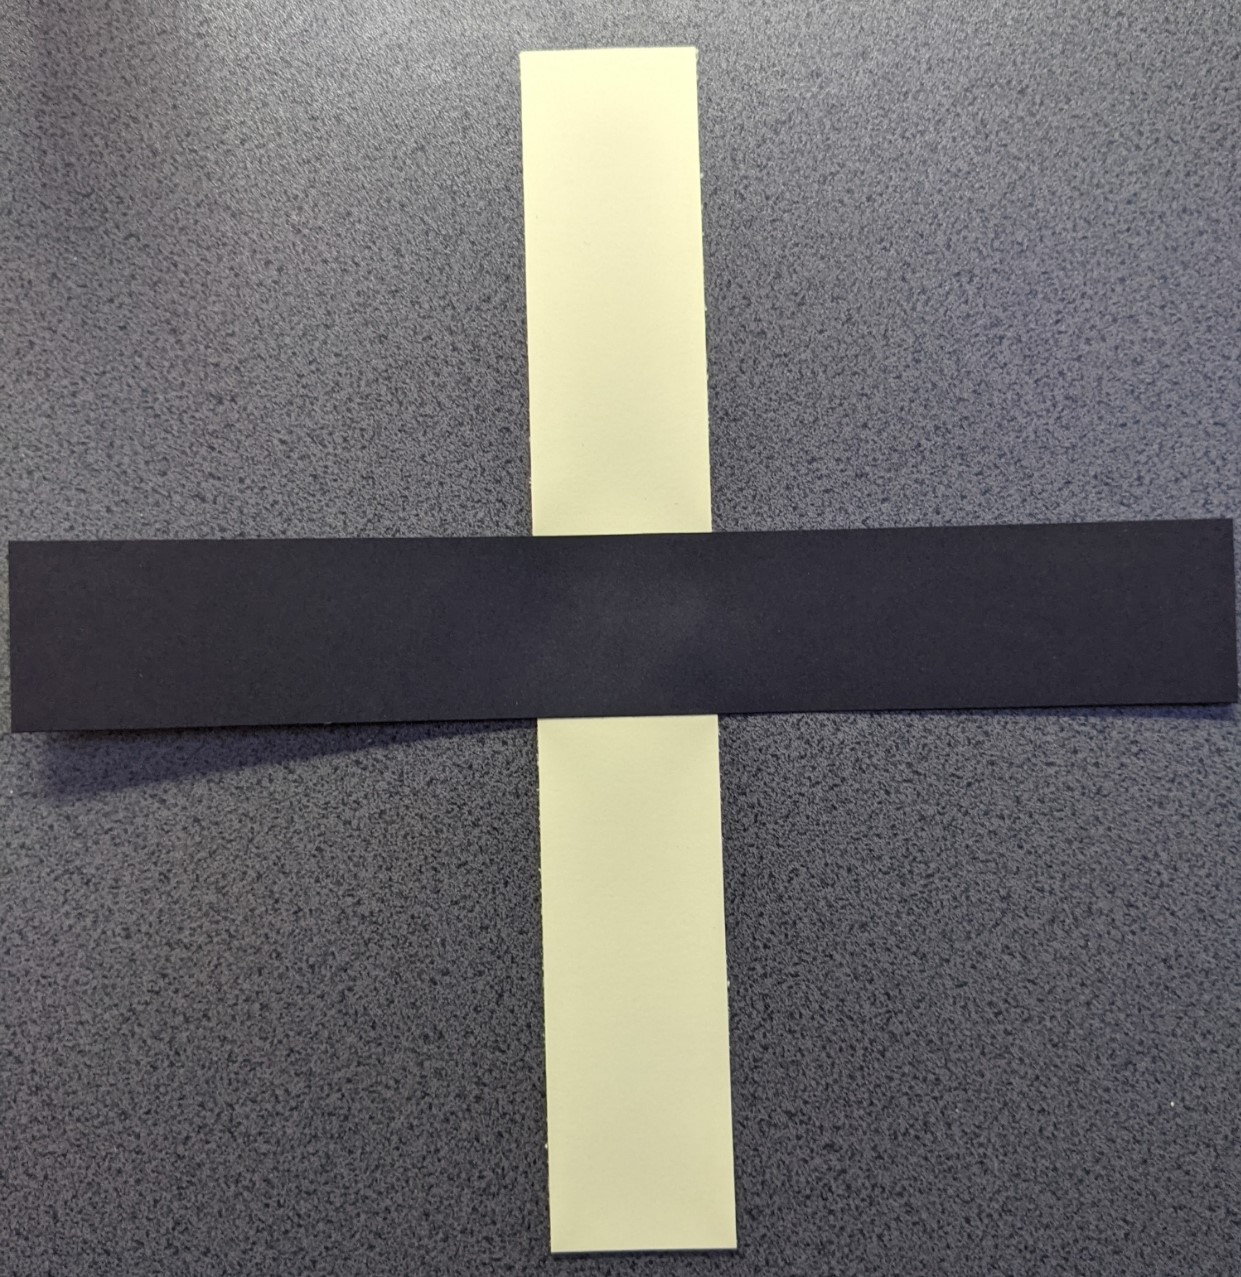
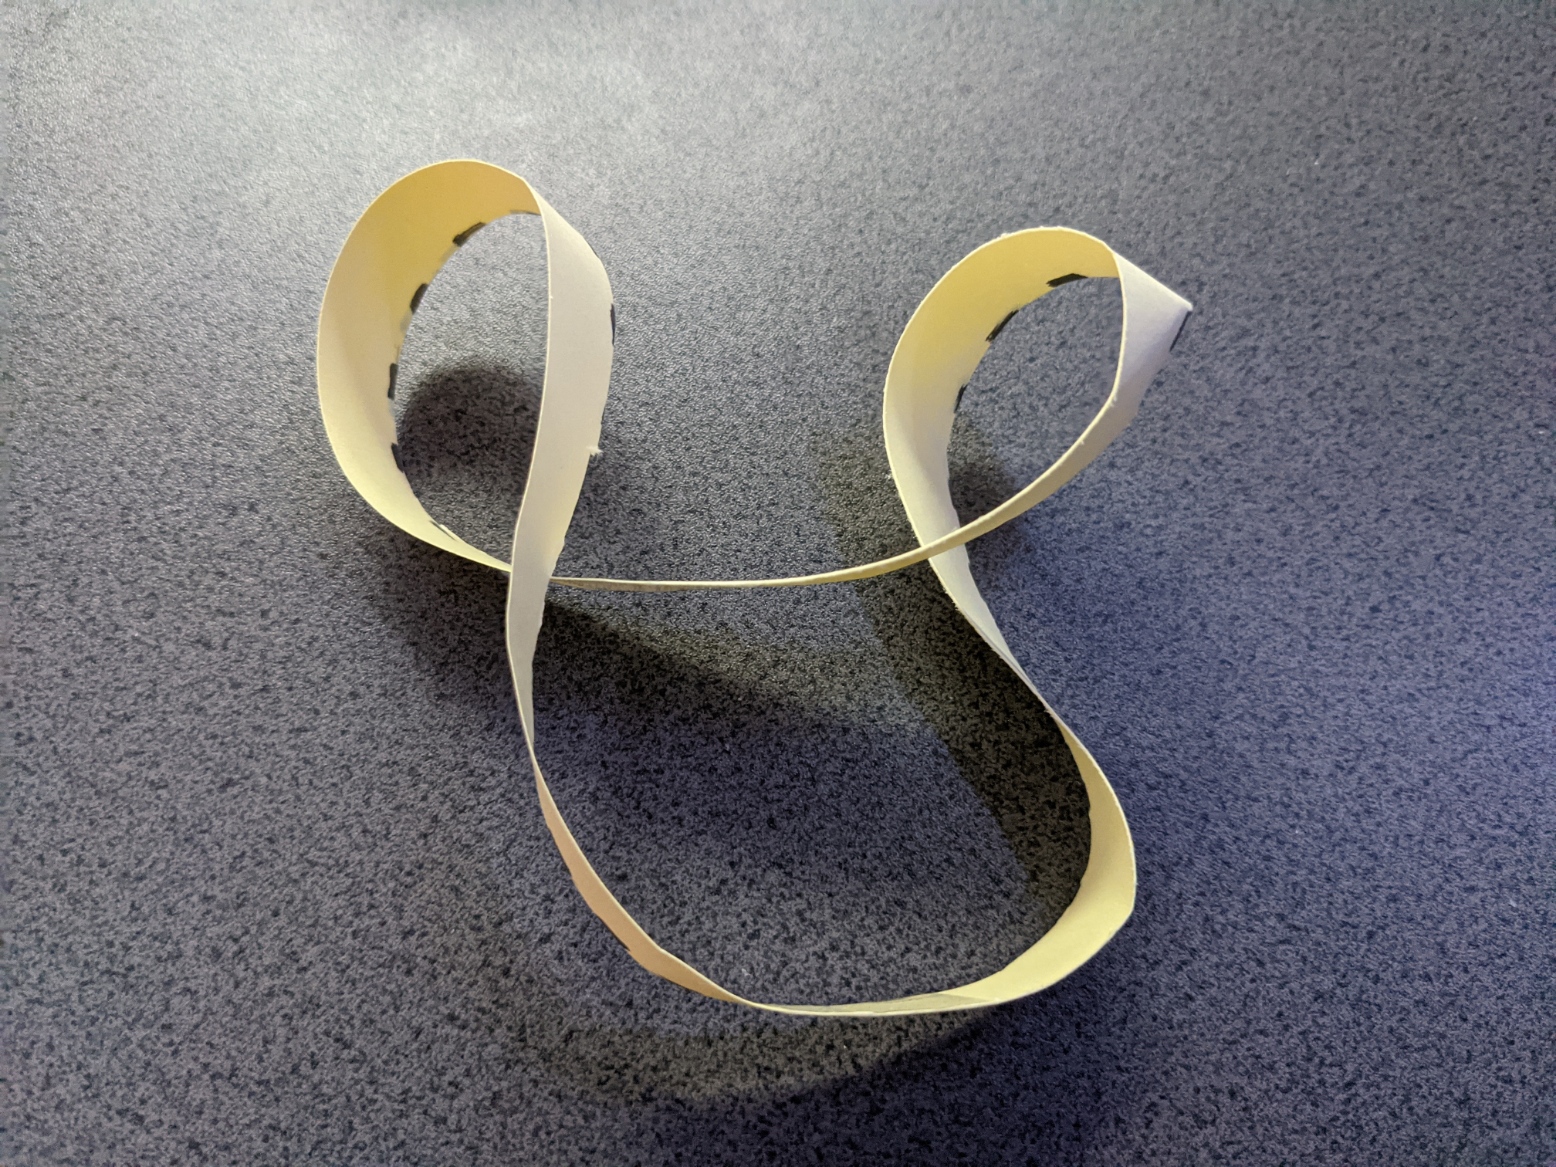
Get two new strips of card or paper of the same size and glue them together in a cross.
Tape one of these strips into a simple loop, the other as a Möbius Strip.
Cut along the central line of both, not including the joining section.
Before we complete the cuts across the glued section, think about what shape(s) you think this action will create.
We already know from the previous challenge what happened with just a Möbius Strip, and we know that a single simple loop cut along the centre line will produce two loops.
When you're ready to check your predictions/thoughts, complete the cuts through the last section - you will need to hold them in place between the two cuts.
We now have a square!
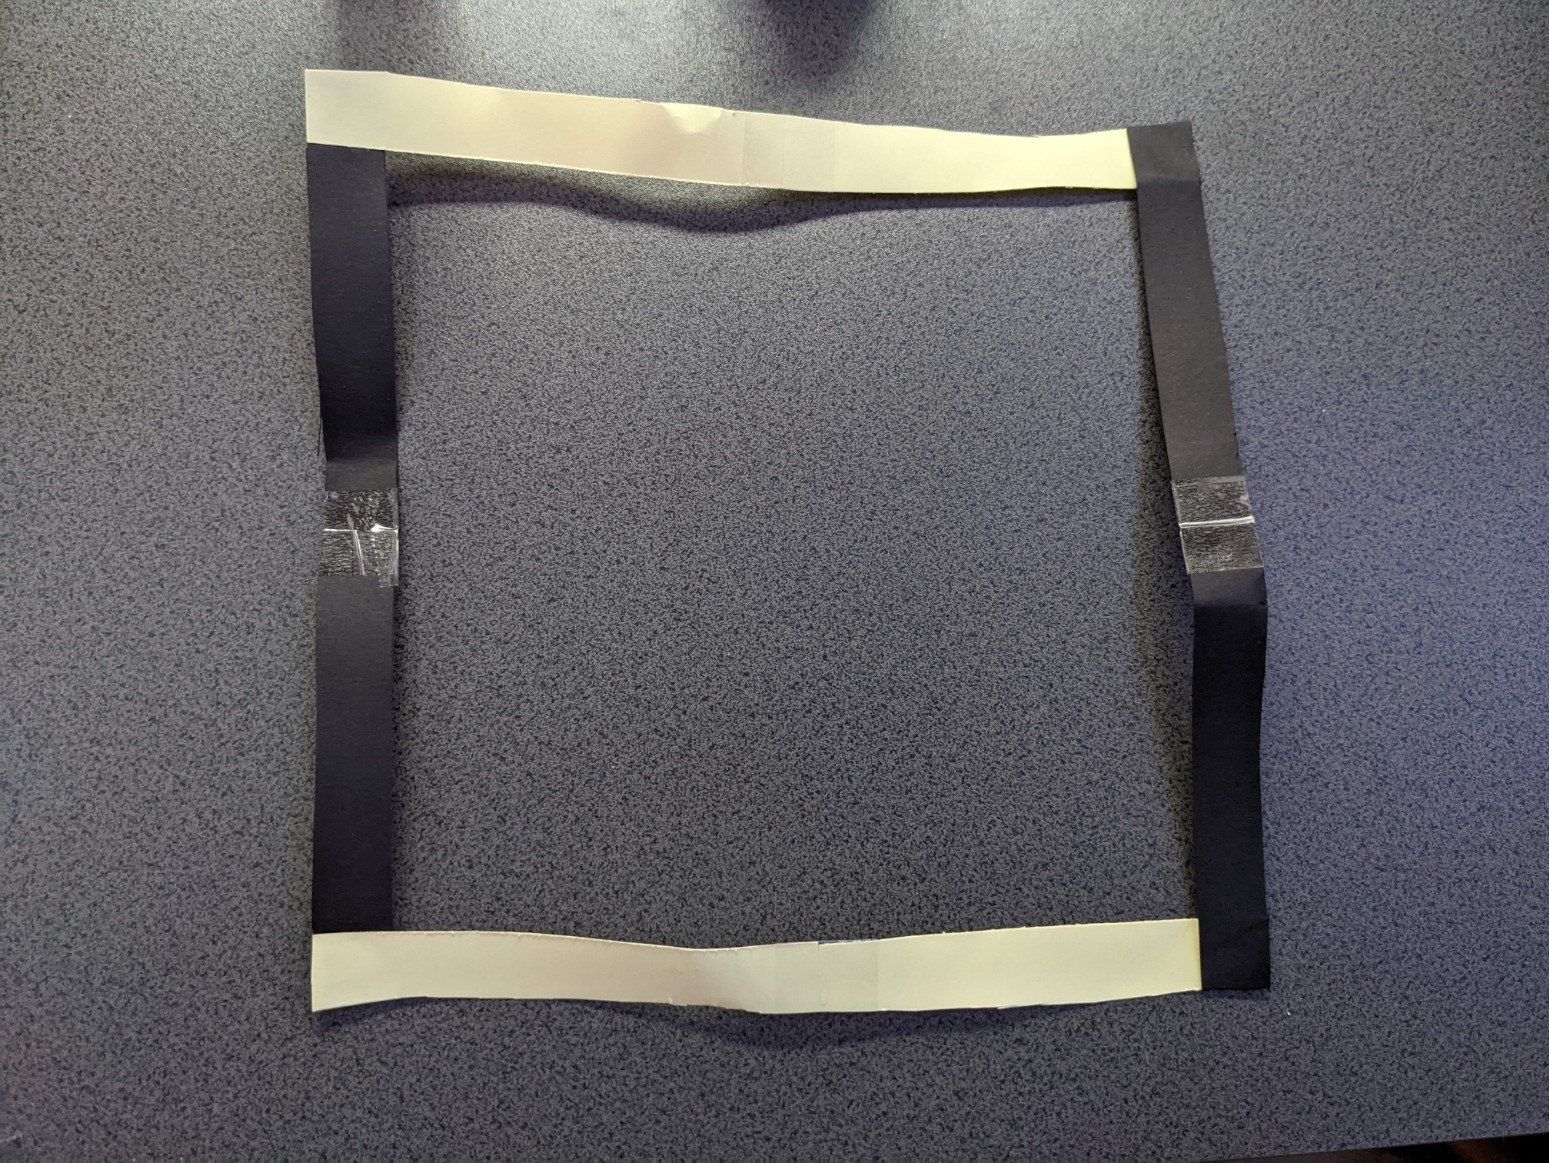
Was this what you expected?
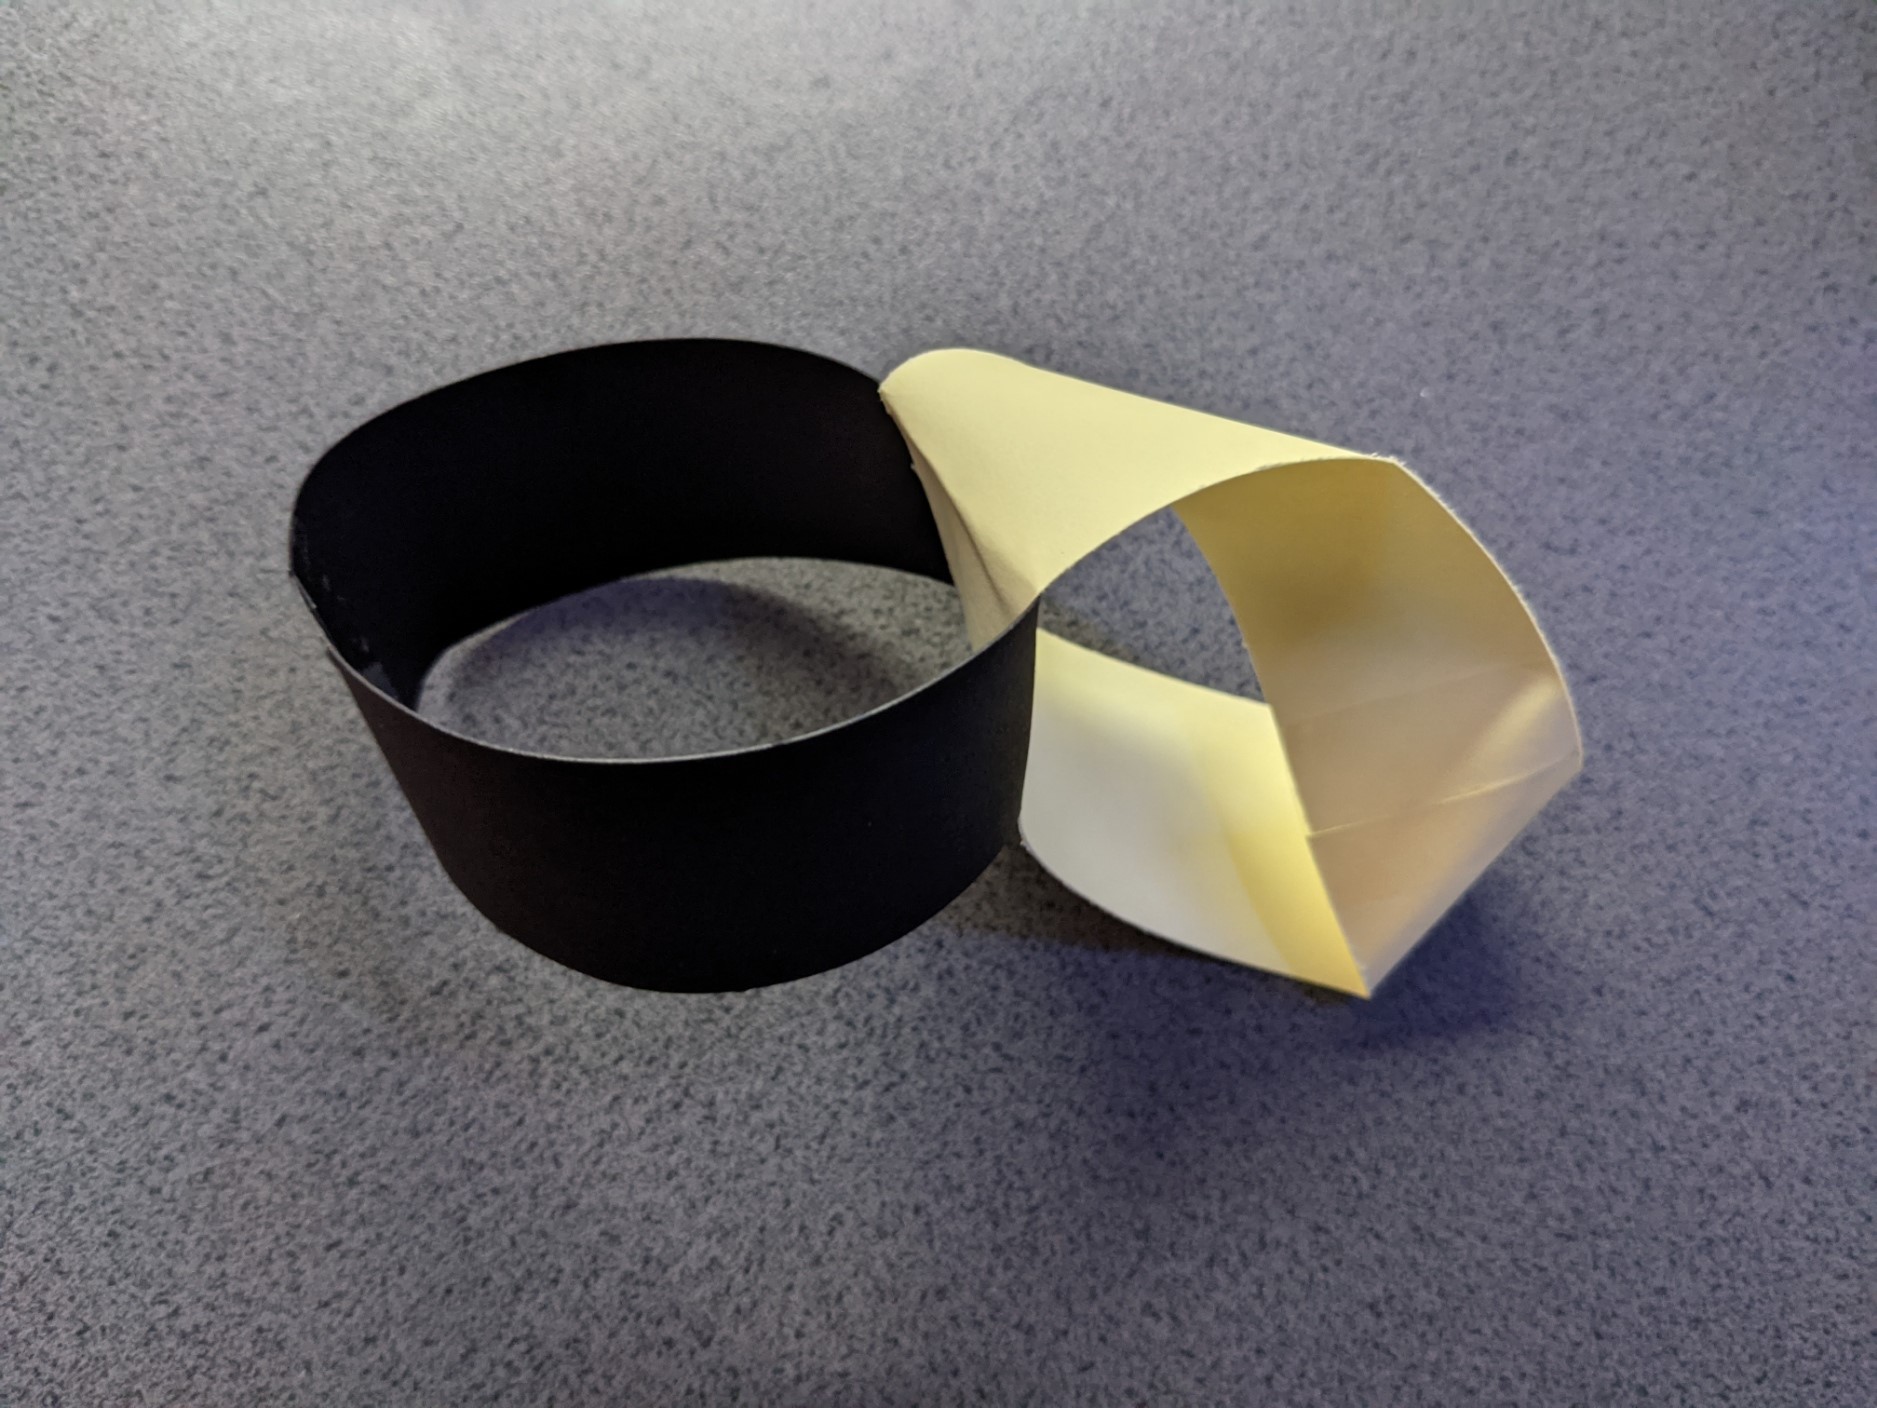
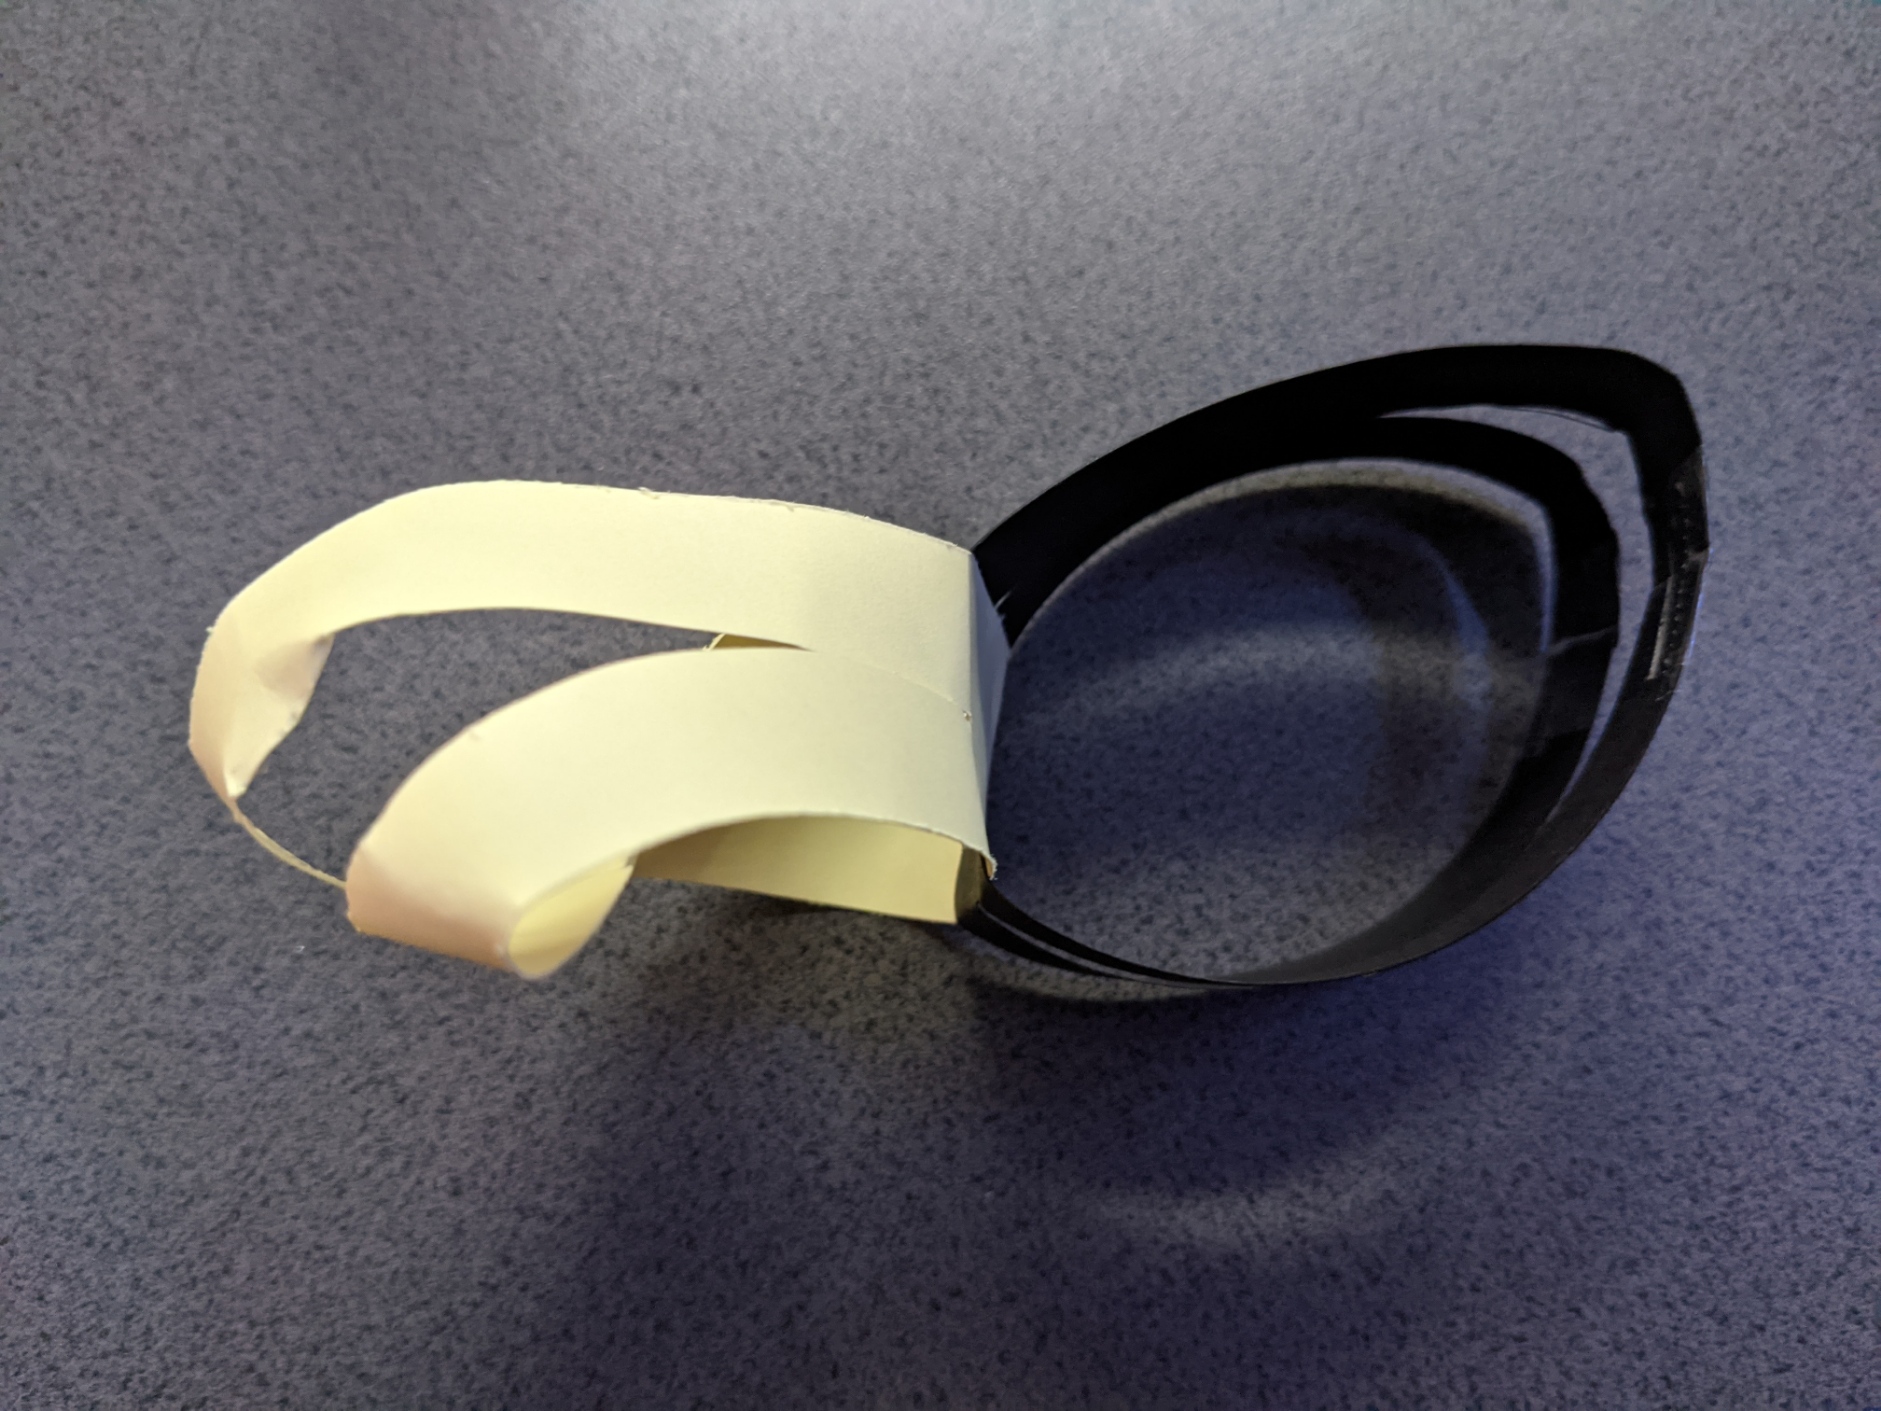
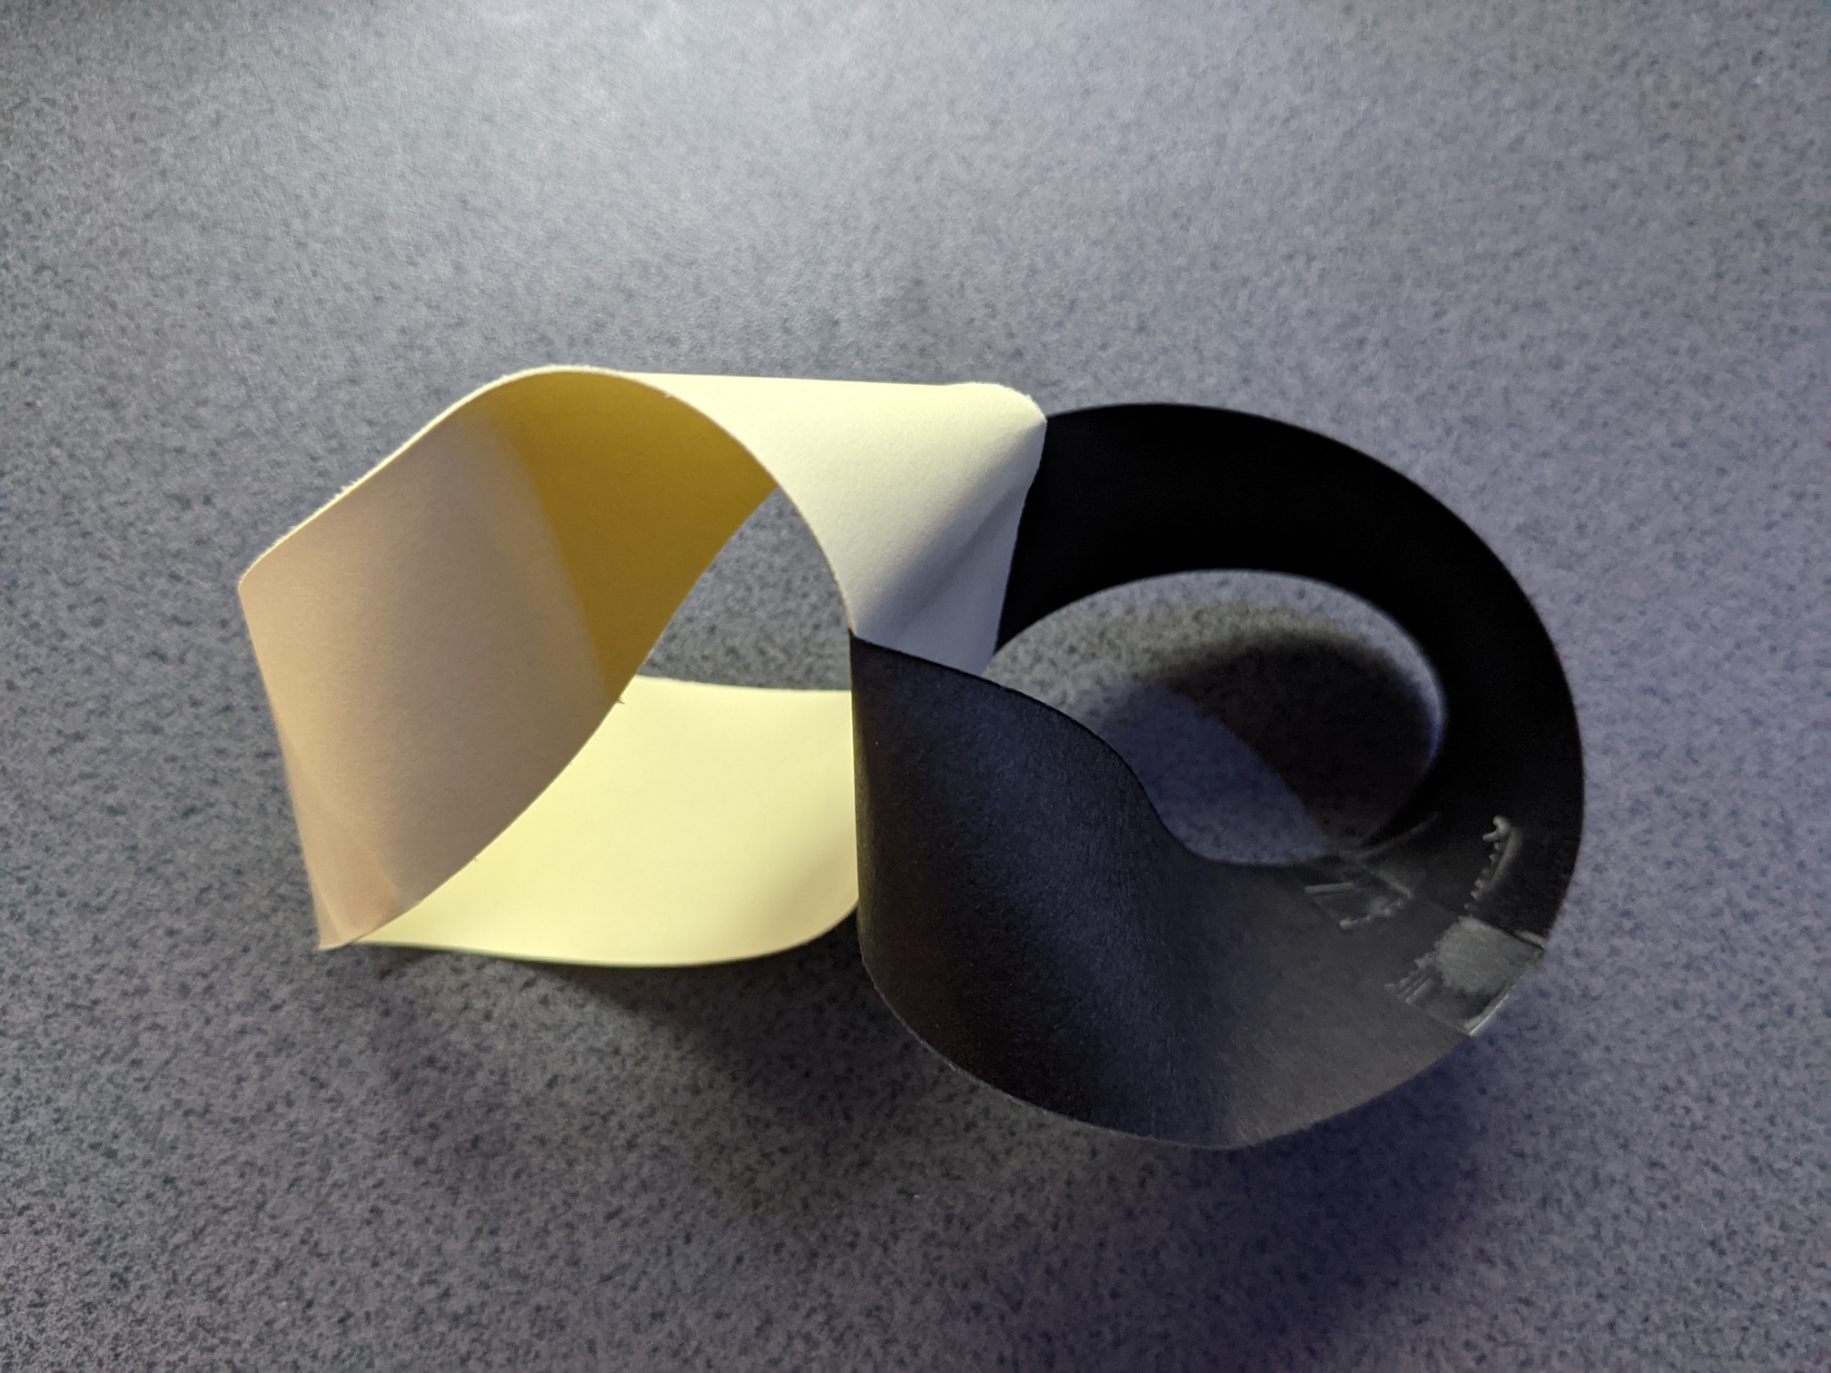
With two new strips of paper/card, glue them together in the same cross configuration as step 1 of challenge 9
This time we will tape them both as Möbius Strips with opposite twists. This means one will be twisted clockwise before taping, the other anti-clockwise.
Cut along the central lines of each strip, up to the sides of, but not through, the joining section
Before we complete both the central cuts through the joining section, let's consider what we think might happen this time.
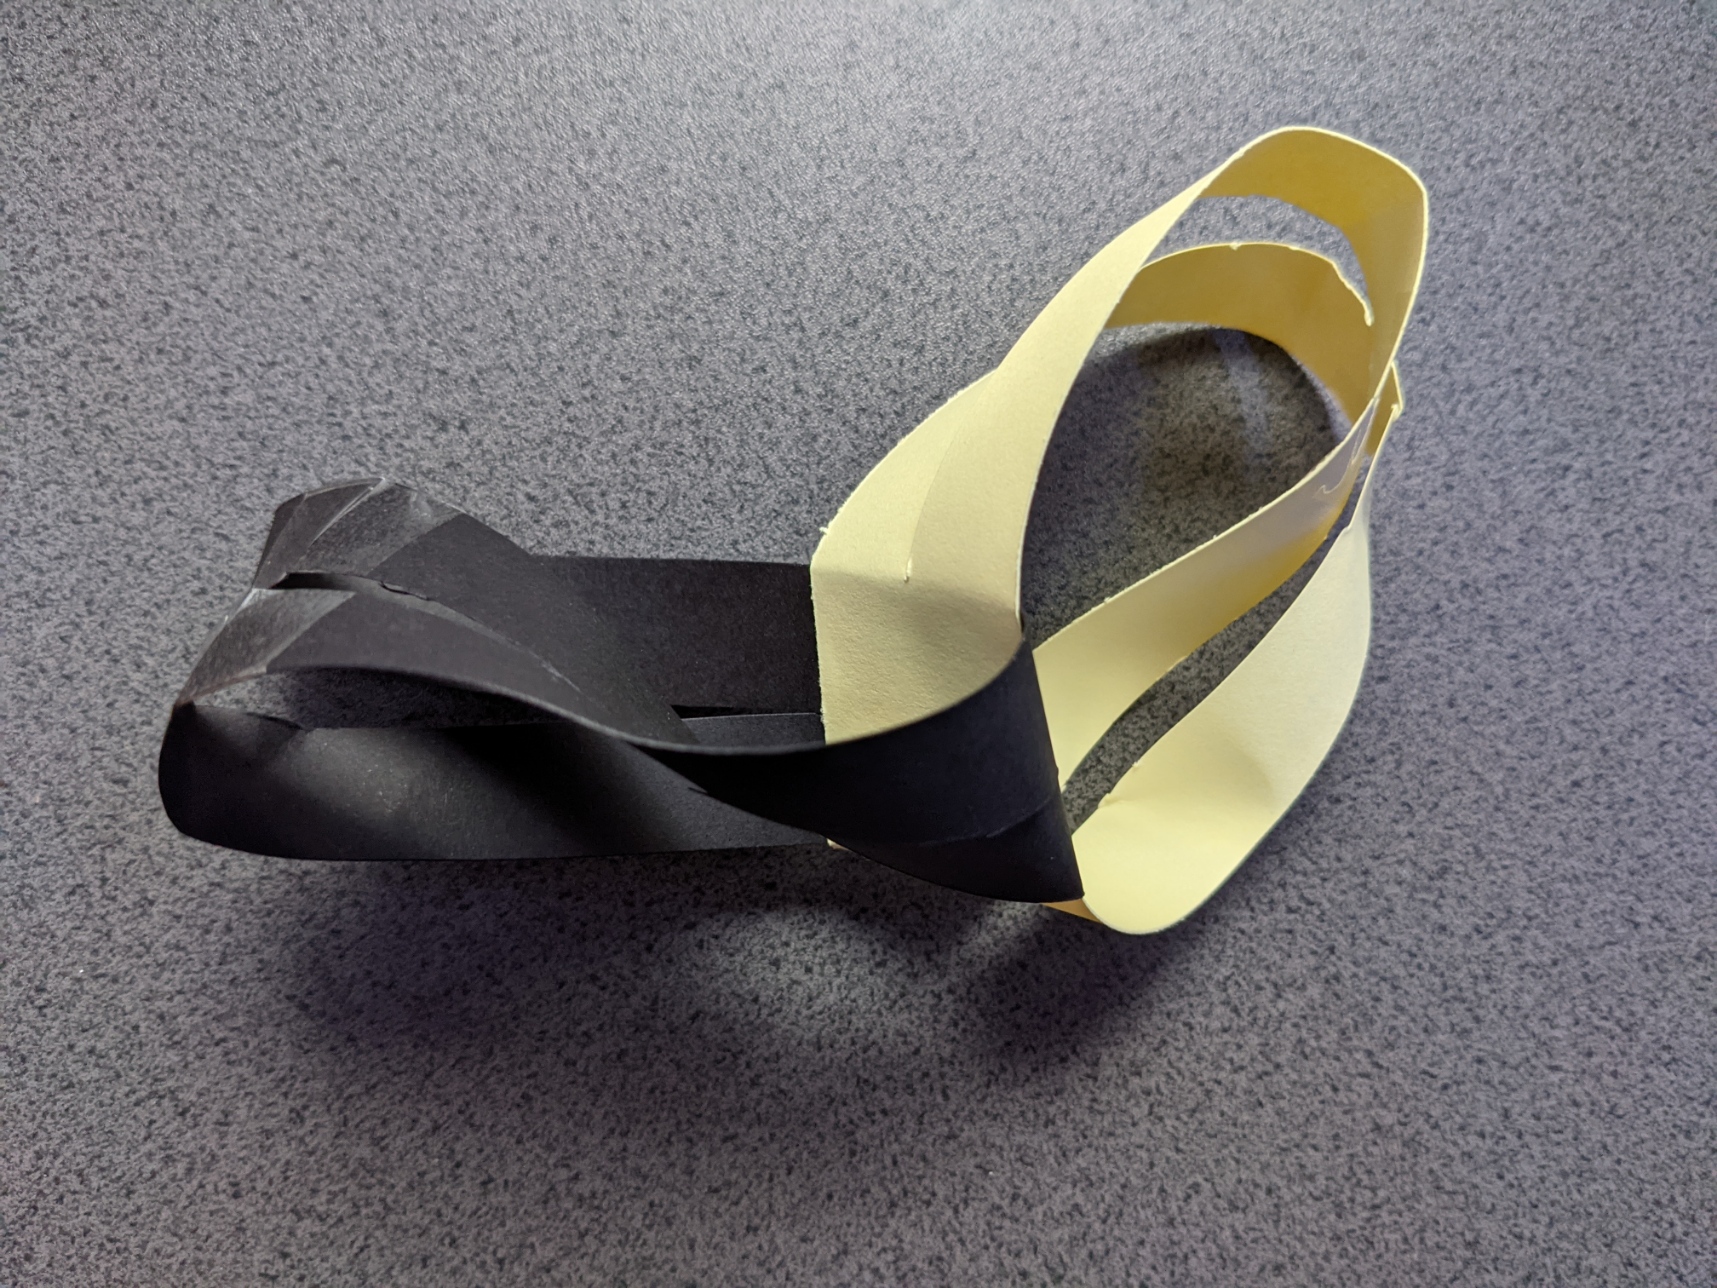
Once you are ready, complete the cuts to see how accurate your predictions were.
We now have two interlocked hearts.
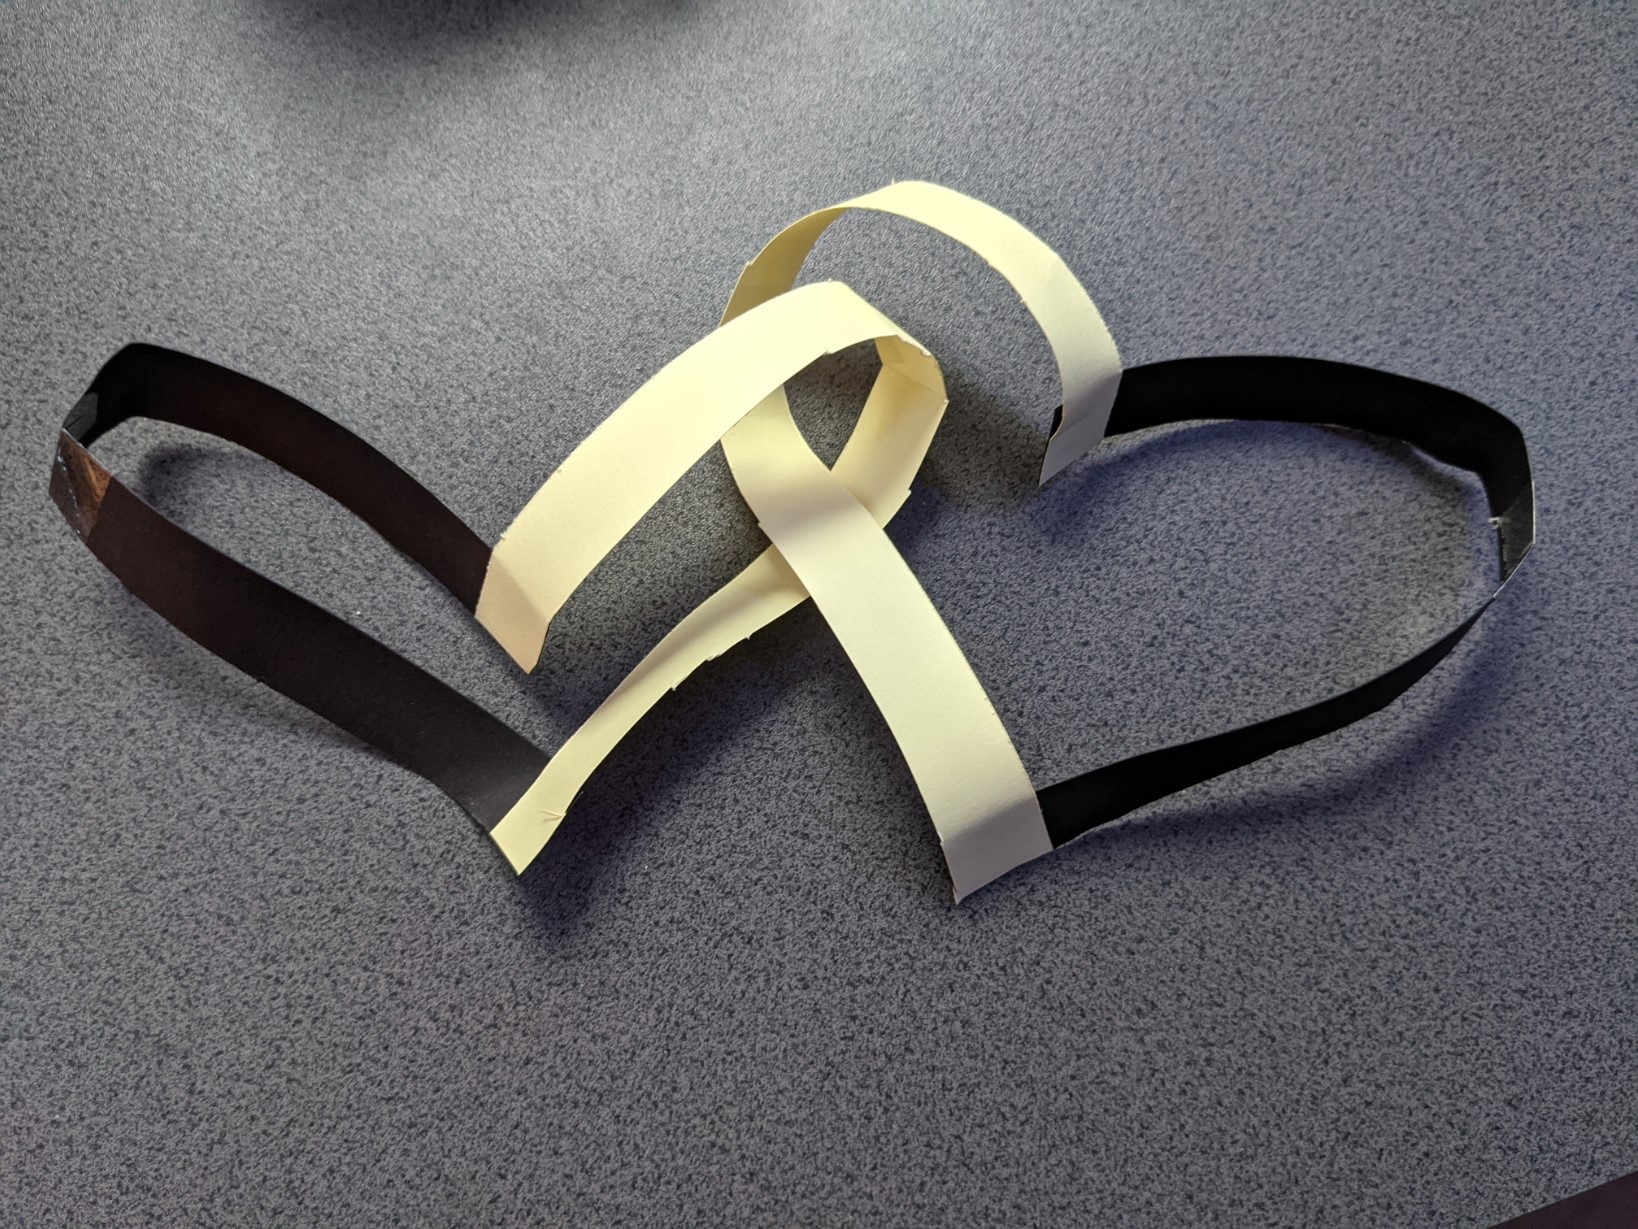
Tip: If you ended up with two separated shapes at this point it means the two Möbius Strips were twisted in the same direction, not opposite (as instructed in step 2).
Follow the instructions below:
Draw the graph of \[f(x) = \sin(x)\] for \[0 < x <{\pi \over 2}\]
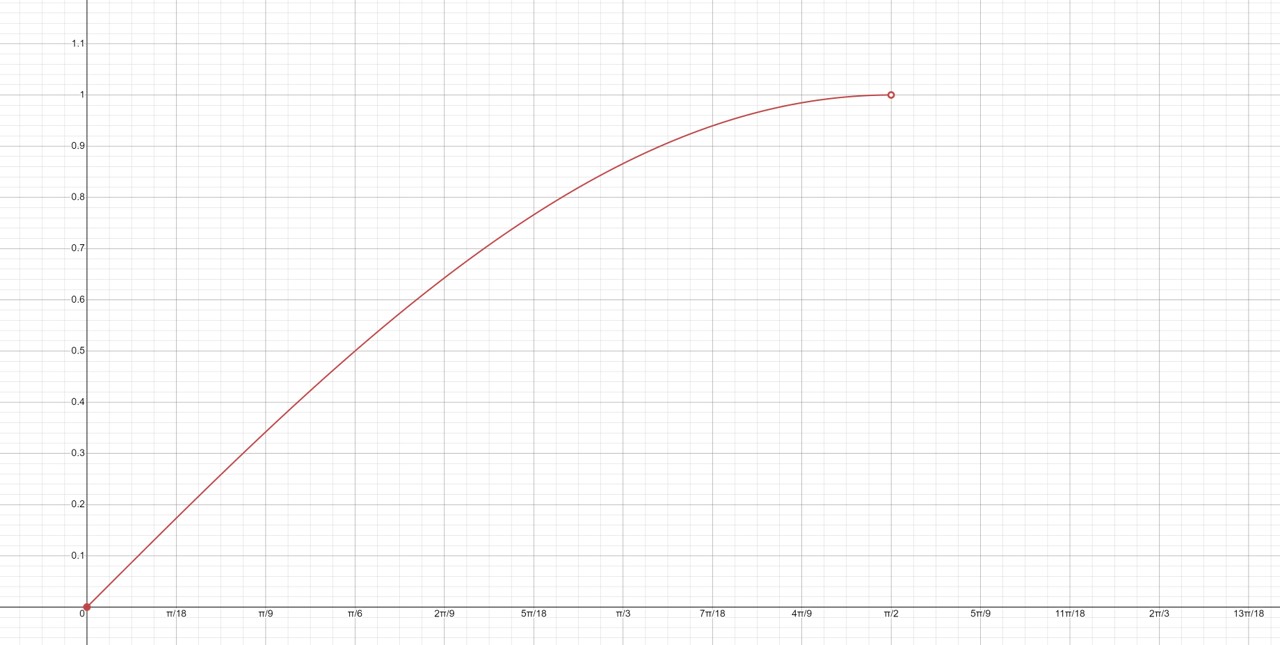
Graph produced using a problem-solving tool available on Mathway.com
Rotate the curve produced by -90°
Draw the reflection of this curve, touching at the base
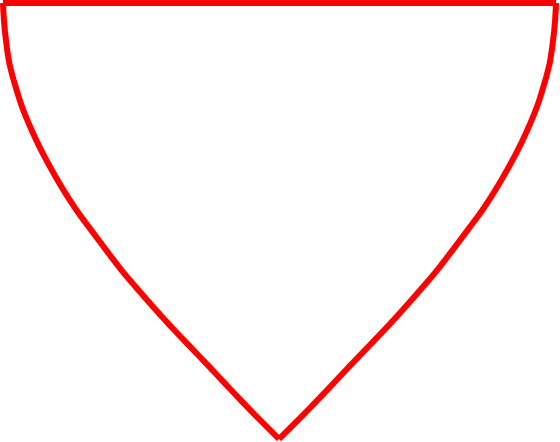
Draw a horizontal line across the top to form a triangle with two curves and a straight side.
Mark the left end of this horizontal line point A, the right end as point B and the mid-point as C
Draw a 180° arc joining point A to C in a clockwise direction, repeat to join point C to B
Follow the instructions below:
Draw the graph of \[f(x) = \sin(x)\] for \[-{\pi \over 2} < x < {\pi \over 2}\]
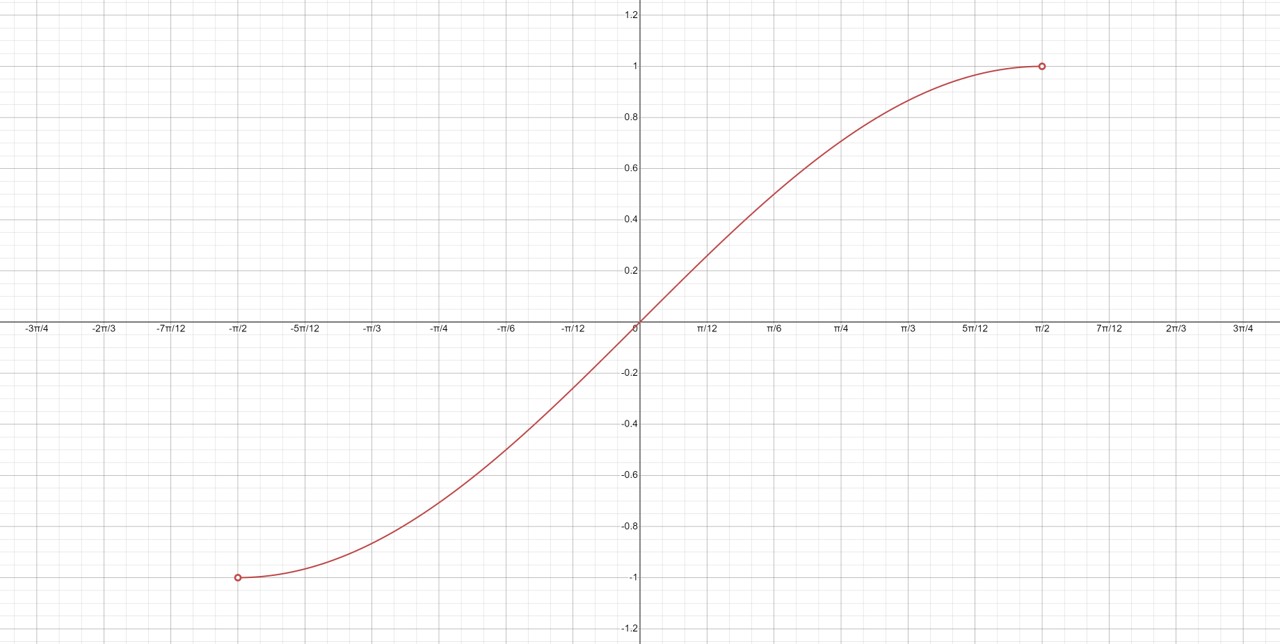
Graph produced using a problem-solving tool available on Mathway.com
Rotate the curve produced by -90°
Draw the reflection of this curve, touching at the base
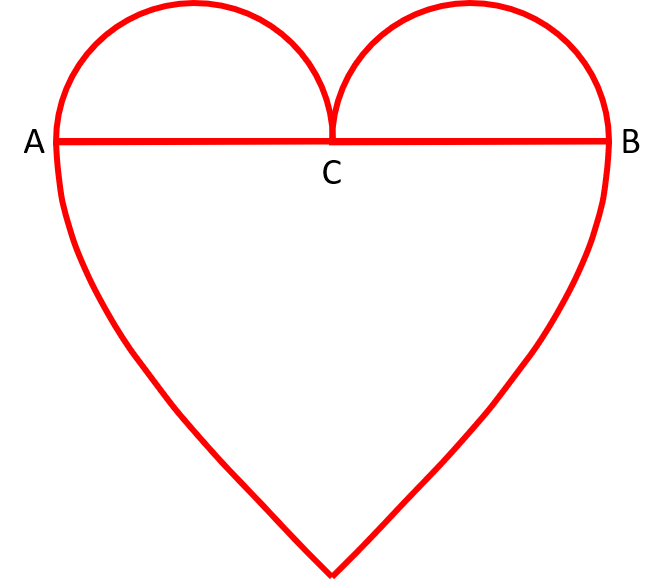
Draw a horizontal line across the top to form a triangle with two curves and a straight side.
Mark the left end of this horizontal line point A, the right end as point B and the mid-point as C
Draw a 180° arc joining point A to C in a clockwise direction, repeat to join point C to B
Follow the instructions below:
Draw a graph using the parametric equations \[x = \alpha \cos t (1 - \cos t)\] and \[y = \alpha \sin t (1 - \cos t)\]
Rotate the curve produced by -90°
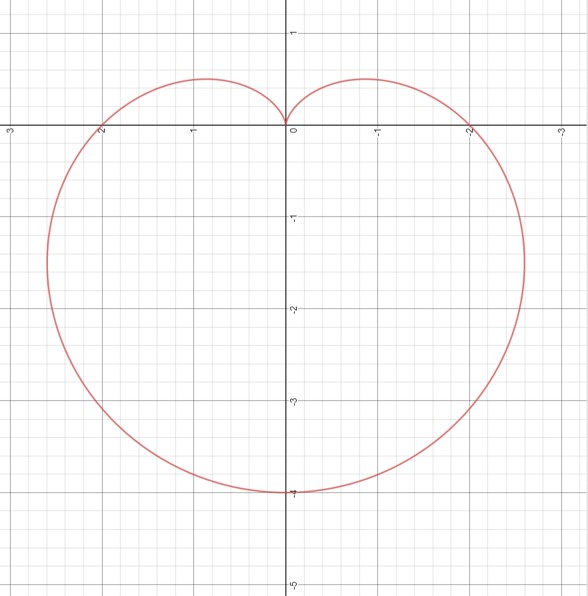
This graph was produced on the Desmos.com Calculator using the polar equation for this curve
This shape is called a cardioid (cardio from the Greek for 'of the heart'). It is more curved then our normal heart designs.
Cardioids can be created naturally, for example through the reflection of light in a circle.
The cardioid is also the main figure of the Mandelbrot set.
We have another romantic themed workshop online called Turtle Flowers aimed at drawing flowers through programming instructions.
Try to use this same program to accurately reproduce all the heart designs you created here.
If you are interested in learning more about the mathematics behind hearts, please check out the following websites: